I started decorating cakes using simple frosting swirls and colorful sprinkles, and the results were surprisingly impressive. Easy decorating techniques saved time while still making cakes look professional. Friends and family always appreciated the homemade charm and creative designs.
Easy decorating cake ideas help transform simple cakes into beautiful creations without requiring advanced baking skills. With a few basic tools and creative touches, anyone can make a cake look special.
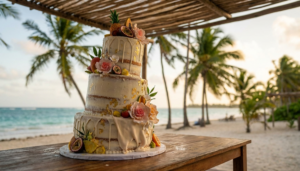
Discover easy decorating cake ideas that turn ordinary desserts into eye-catching masterpieces using simple tools, creativity, colors, and fun.
Why Most Home Bakers Struggle with Easy Decorating Cake:
The problem isn’t creativity. Most people who struggle with easy decorating cake are creative, enthusiastic, and genuinely motivated. The real issue is skipping foundational prep work that professionals treat as non-negotiable.
Warm butter in buttercream creates grease puddles. Unleveled cake layers tilt under pressure. Rushing the crumb coat — the thin first layer of frosting that seals in crumbs — ruins every subsequent step. These aren’t advanced problems. They’re beginner-stage decisions that compound into frustrating results.
Easy decorating cake starts before you pick up a spatula. It starts with how you cool your cake, how you level it, and what temperature your frosting is when you apply it. Nail those three things, and the decorating becomes genuinely easy.
Professional bakers know that setup is 70% of the job. The actual piping or spreading is maybe 30%. So when someone says decorating is hard, what they usually mean is they skipped the setup, hit problems at the decorating stage, and blamed the wrong part of the process.
Easy decorating cake is not a matter of artistic talent. It’s a matter of sequencing decisions correctly, using the right tools, and understanding how fat, sugar, and temperature interact under pressure.
The Non-Negotiable Tools You Need for Easy Decorating Cake:
You don’t need a professional kitchen. But you do need the right five items to make easy decorating cake achievable at home.
- Offset spatula (angled, 9-inch): This is the single most impactful tool for easy decorating cake. The angled blade lets you spread frosting without your knuckles dragging across the surface.
- Turntable: A rotating cake stand transforms easy decorating cake from a chore into something almost meditative. Spin, spread, done.
- Bench scraper: Getting smooth sides on any cake requires a long straight edge held at 90 degrees while the turntable spins. No bench scraper means no smooth sides.
- Piping bags and tips: Reusable silicone bags hold more, leak less, and survive dishwashers. Start with a 1M star tip and a round tip — those two alone unlock most decorations.
- Cake leveler or serrated knife: Domed tops must be removed before stacking. Every professional cake builder knows this. Easy decorating cake becomes impossible on an uneven foundation.
Buttercream Temperatures and Why They Control Everything:
Temperature is the invisible variable that determines whether easy decorating cake stays easy or turns into a sweaty disaster on your kitchen counter. Every frosting — American buttercream, Swiss meringue, Italian meringue — behaves differently based on ambient temperature, butter temperature, and sugar ratio. Understanding this completely changes your results.
When butter is too cold, buttercream looks curdled and lumpy. When it’s too warm, it runs, loses structure, and won’t hold piped shapes. The window for working with buttercream at peak readability is surprisingly narrow: between 68°F and 72°F for the finished frosting.
Easy decorating cake depends heavily on getting this right every single time.
1: How to Fix Broken Buttercream
Broken buttercream — the curdled, separated mess that looks like scrambled eggs in frosting — is one of the most common problems people hit during easy decorating cake attempts. It happens when cold butter chunks haven’t fully emulsified into the sugar and egg mixture.
Fix it by warming the bowl gently with a heat gun or placing it briefly over a pot of simmering water, then beating again on high. The fat will re-emulsify into a silky, smooth consistency within two to three minutes.
2: Adjusting Consistency for Different Techniques
Not every decorating technique uses the same buttercream consistency. For spreading and crumb coating, a medium consistency — the frosting holds a soft peak and spreads without dragging — works best. For piped rosettes and stars, stiffen the frosting slightly by adding powdered sugar a tablespoon at a time. For fine writing or detailed flowers, stiffen further until the frosting holds a sharp peak.
Easy decorating cake requires you to have at least two different consistencies ready: one for base coating and one for detail work. Mixing these up causes most of the piping disasters beginners experience.
3: Choosing the Right Buttercream for Your Climate
In humid, warm kitchens, Swiss meringue buttercream holds up better than American buttercream because it has lower sugar content and is more resistant to weeping. In cool, dry kitchens, American buttercream — butter, powdered sugar, cream — gives you longer working time before crusting. Easy decorating cake in a Texas summer requires a different formula than easy decorating cake in a Minnesota February.
The Crumb Coat Method That Changes Everything:
The crumb coat is where easy decorating cake either succeeds or fails. Skip it and loose crumbs contaminate your final frosting layer. Do it correctly and the final coat glides on flawlessly.
- Apply a thin, even layer: Use your offset spatula to spread a thin coat of buttercream across the top and sides of the cake, pressing gently to seal in loose crumbs.
- Don’t try to make it pretty: The crumb coat isn’t the final layer. Rough edges, visible cake through the frosting — all of that is fine and expected at this stage.
- Chill for at least 20 minutes: The crumb coat must be cold and firm before you add the final layer. This is non-negotiable for easy decorating cake.
- Check for completeness: Every exposed piece of cake surface should be covered. Gaps in the crumb coat let crumbs escape into your final layer.
- Use the right temperature frosting: If your frosting is too stiff, it tears the cake surface. Too soft, it doesn’t seal. Room temperature buttercream (around 70°F) spreads without resistance.
Mastering Smooth Sides on Any Cake:
Smooth sides are the hallmark of a professionally finished easy decorating cake. Most home bakers assume smooth sides require expensive equipment or years of practice. Neither is true.
The technique requires a turntable, bench scraper, and cold frosting — that’s the complete list. Understanding the mechanics behind it removes all the mystery from easy decorating cake at a professional level.
1: The Spinning Method for Perfect Sides
Load your bench scraper against the side of the cake at a 90-degree angle, pressing gently without forcing. Start spinning the turntable with your other hand — consistent speed matters more than fast speed. Keep the scraper stationary while the cake rotates past it. The frosting left behind will be perfectly even.
Practice this on a dummy cake made from foam if you want to build muscle memory before you practice on real baked layers. Many decorating instructors recommend this approach for easy decorating cake training because mistakes on foam cost nothing.
2: Filling in Gaps and Low Spots
After your first pass with the bench scraper, you’ll see low spots — places where the frosting dipped below the cake surface. Use your offset spatula to dab a small amount of fresh buttercream into those spots, then run the bench scraper again. Repeat until the side is uniformly flat.
Easy decorating cake with smooth sides usually takes three to four passes total. Each pass removes excess, each spot-fill fills deficits. After four passes, most home bakers achieve results they wouldn’t have thought possible before learning this method.
3: Getting Sharp Top Edges
Sharp edges — the crisp 90-degree angle between the top and side of a cake — require one specific technique. After smoothing your sides, use your bench scraper at a slightly inward angle on the top edge, dragging toward the center. This pulls any excess frosting inward rather than outward, creating a clean, defined corner.
Easy decorating cake with sharp edges photographs dramatically better than cakes with soft, rounded edges. If you’re decorating for social media or events, this detail alone elevates the perceived skill level significantly.
Pattern and Texture Techniques That Require Zero Artistic Skill:
Not every easy decorating cake needs a smooth surface. Texture techniques hide imperfections, add visual interest, and take less time than you’d expect.
- Raked lines: Drag a fork or comb tool through soft buttercream in straight horizontal lines for a rustic, textured finish that looks intentional and hides any unevenness.
- Swoops and peaks: Use the back of a spoon to press into the frosting and pull away sharply, creating a series of irregular peaks. This works especially well for easy decorating cake on rustic-style celebrations.
- Palette knife painting: Thin colored buttercream with a small amount of corn syrup and drag your palette knife across the surface for a watercolor effect that looks complex but takes under ten minutes.
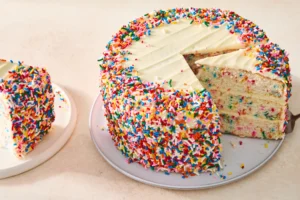
- Pressed sprinkle coating: After frosting, press handfuls of sprinkles against the lower third of the cake. The frosting holds them in place without any adhesive.
- Stencil work: Hold a stencil against the frosted surface and dust with powdered cocoa, edible gold dust, or colored lustre powder. Remove the stencil and the pattern stays — this is genuinely one of the easiest easy decorating cake techniques available.
| Decoration Technique | Skill Level | Time Required | Tools Needed | Best For |
| Smooth Buttercream | Beginner-Intermediate | 30–45 min | Offset spatula, bench scraper, turntable | Weddings, formal events |
| Raked Texture | Beginner | 10–15 min | Fork or comb tool | Rustic celebrations |
| Palette Knife Painting | Beginner | 10–20 min | Palette knife, food coloring | Artistic, modern cakes |
| Piped Rosettes | Beginner | 15–25 min | 1M tip, piping bag | Birthdays, parties |
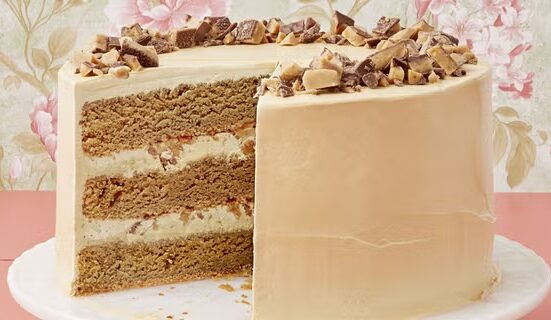
| Fondant Covering | Intermediate | 45–60 min | Rolling pin, smoother | Sculpted, themed cakes |
| Stencil Dusting | Beginner | 5–10 min | Stencil, food-safe dust | Quick upgrades |
| Chocolate Drip | Beginner | 10–15 min | Squeeze bottle or spoon | Modern drip cakes |
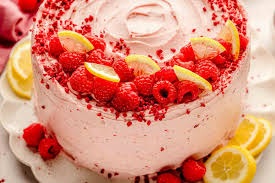
| Pressed Florals | Intermediate | 20–30 min | Dried/fresh edible flowers | Garden parties |
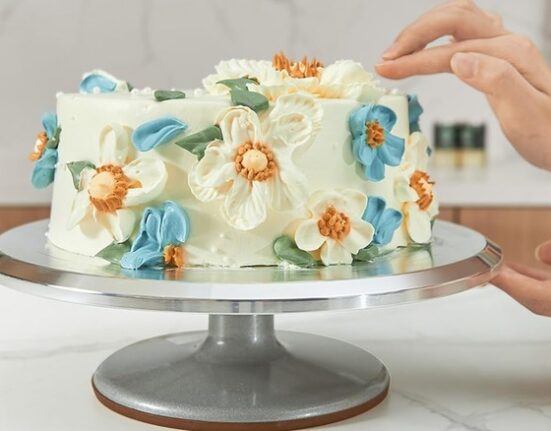
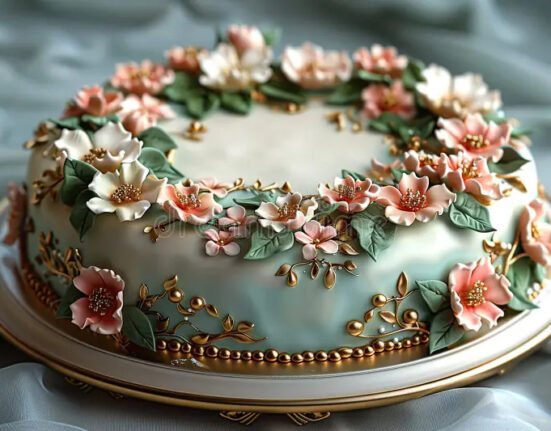
| Buttercream Flowers | Intermediate-Advanced | 45–90 min | Flower nail, petal tips | Botanical themes |
| Sprinkle Coating | Beginner | 5 min | Hands | Kids’ parties |
| Mirror Glaze | Advanced | 60–90 min | Thermometer, pouring setup | Showpiece cakes |
| Geode Effect | Advanced | 90–120 min | Rock candy, food gel | Statement cakes |
Piping Basics Every Home Baker Needs to Know:
Piping intimidates people who’ve never done it. But easy decorating cake through piping is actually far more forgiving than smooth-coat work — imperfect rosettes still look deliberate, and slight variations in pressure create organic texture that actually looks better than mechanical uniformity.
Starting with piping means starting with hand position. Most beginners hold the bag at the wrong angle, which causes inconsistent pressure and uneven shapes. Understanding grip and pressure control makes the difference between a bag of frosting and a decorating tool.
1: Grip and Pressure Control
Hold the piping bag with your dominant hand twisted around the top of the bag, sealing the frosting below your grip. Your non-dominant hand guides the tip at the base. Apply pressure from the top — squeezing the middle of the bag creates air pockets and inconsistent flow, which ruins easy decorating cake piping results.
Consistent pressure produces consistent shapes. Practice on parchment paper before piping on an actual cake. Twenty practice rosettes on paper translates directly to clean rosettes on a frosted surface.
2: Reading Piping Tip Numbers
Wilton tip numbers follow a specific logic. Round tips run from 1 (tiny writing) to 12 (large dots). Star tips — your most-used category for easy decorating cake — include the 1M (large open star rosette), 4B (large closed star), and 2D (drop flower). Petal tips (101–104) create single petals for flower assembly on a flower nail.
3: Piping Borders and Edges
Shell borders — the most classic easy decorating cake edge technique — use a star tip held at a 45-degree angle. Apply pressure, pull the tip slightly back toward yourself as frosting accumulates, then release pressure and drag forward to create the tail. Repeat, overlapping each shell slightly over the tail of the previous one.
Rope borders use a round tip in a figure-eight motion. Zigzag borders use consistent back-and-forth strokes at even spacing. None of these require artistic skill — they require consistent repetition of a simple mechanical motion.
Working with Fondant Without Frustration:
Fondant intimidates home bakers more than any other easy decorating cake medium, but the fear mostly comes from one common mistake: applying fondant to a cold cake. Cold cakes make fondant tears and crack. Room temperature cakes let fondant drape and stretch without resistance.
- Knead fondant until it’s warm and pliable: Cold fondant from the bag is stiff and cracks. Microwave ten seconds at a time, kneading between sessions, until it stretches without breaking.
- Roll to a 1/8-inch thickness: Too thick and it’s heavy, too thin and it tears. Use rolling guide rings or rubber bands around your rolling pin for consistent thickness.
- Lift with a rolling pin, not your hands: Drape the rolled fondant over your rolling pin and unfurl it over the cake. Hands cause fingerprints and warping.
- Smooth from top to sides: Use a cake smoother or your hands in a downward motion, smoothing from the top center outward and down the sides to eliminate air bubbles.
- Trim at the base: Use a sharp knife or pizza cutter to trim excess fondant flush with the cake board. Clean, sharp cuts make decorating cake with a fondant look finished rather than homemade.
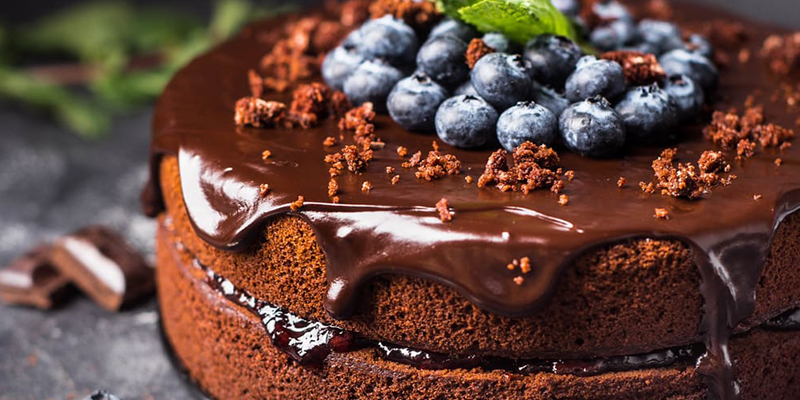
Ganache, Drips, and Glazes for High-Impact Easy Decorating Cake:
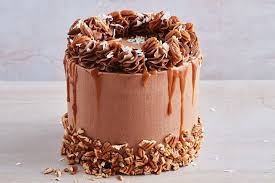
Chocolate ganache drips became the dominant easy decorating cake trend because they look spectacular and require almost no technique. The science is simple: semi-sweet chocolate melted with heavy cream creates an emulsion that flows at controlled rates depending on temperature.
Ratios matter here. A 1:1 ratio of chocolate to cream by weight produces a medium ganache — thick enough to hold a drip without running off the cake base, thin enough to flow smoothly. A 2:1 ratio (more chocolate) produces a thicker ganache used for truffles. A 1:2 ratio (more cream) produces a pourable glaze.
1: Ganache Temperature for Perfect Drips
Ganache applied at 90°F flows quickly and produces long, dramatic drips. At 85°F, it flows more slowly and stops sooner, creating shorter, more controlled drips. At 80°F or below, it barely flows and sets almost immediately on contact with a cold cake.
For easy decorating cake with drips, chill the frosted cake thoroughly before applying ganache. A cold cake surface slows the ganache flow on contact, giving you time to control the drip length before it runs too far.
2:Colored White Chocolate Drips
White chocolate ganache — white chocolate chips melted with heavy cream — takes food coloring well when you use oil-based food coloring. Water-based coloring causes white chocolate to seize. Easy decorating cake with colored drips requires this distinction, or you’ll end up with a clumped, grainy mess instead of smooth flowing color.
3: Mirror Glaze Mechanics
Mirror glaze requires gelatin, sugar syrup, condensed milk, and white chocolate, cooked to a specific temperature (around 95°F at time of pouring) and applied over a fully frozen cake. Easy decorating cake with mirror glaze is genuinely more advanced than any technique on this list, but the physics are straightforward once understood. The frozen cake surface causes the glaze to set on contact, trapping the reflective shine before it runs off.
Color Theory and Food Coloring Basics:
Color choices define the aesthetic of any easy decorating cake more than any other decorating decision. Understanding basic color theory — complementary colors, analogous palettes, split-complementary combinations — prevents the muddy, confusing color combinations that make cakes look unintentional.
Gel food coloring is the standard for professional-level easy decorating cake. Liquid coloring dilutes frosting and throws off consistency. Gel coloring adds intense pigment with tiny drops, leaving buttercream texture unchanged.
Mix colors in small amounts first. Buttercream darkens as it sits — what looks dusty pink now may look hot pink in two hours, especially with red-based colors. Knead fondant with tiny amounts of gel, checking color development over five-minute rests between additions.
Sage green, terracotta, dusty mauve — these sophisticated neutrals consistently perform better than saturated primary colors on adult cakes. Easy decorating cake for children, though, benefits from saturated, high-contrast color because visual excitement matters more than sophistication at a birthday party.
Storing and Transporting a Decorated Cake:
Easy decorating cake skill means nothing if the finished product doesn’t survive the journey to the party. Decorated cakes are structurally fragile objects that respond badly to heat, humidity, and vibration.
Buttercream-frosted cakes can sit at room temperature for up to two days in cool, dry conditions. In warm or humid environments, refrigerate and bring to room temperature for at least two hours before serving — cold buttercream is dense and waxy on the palate, not at all representative of how it tastes at proper temperature.
Easy decorating cake transport requires a non-slip mat under the cake box, a flat vehicle surface, and air conditioning. A buttercream cake in a hot car for twenty minutes will slide off its board, melt against the box, and lose any surface detail you worked hours to create.
For tiered cakes, internal support — wooden or plastic dowels inside each tier — prevents upper tiers from compressing and collapsing into lower ones. Standard cake boxes are too short for tiered cakes; find extended-height boxes or build a stabilizing frame from cardboard.
Building a Consistent Easy Decorating Cake Practice:
Every easy decorating cake skill improves through deliberate repetition on real cakes. The mistake most people make is practicing on one cake per occasion — occasional baking doesn’t build motor memory fast enough to make techniques feel natural.
Set a regular practice schedule. One cake per week for six weeks, each week focused on one specific skill: week one is crumb coats, week two is smooth sides, week three is piping, and so on. This focused approach builds easy decorating cake competence faster than doing everything at once on occasional party cakes.
Document your work with photos after each session. Reviewing your own timeline of cakes shows progress that’s invisible at the moment. Bakers who track their work consistently report faster improvement in easy decorating cake skills than those who bake without documentation.
Seek community. The cake decorating community on YouTube, Reddit’s r/cakedecorating, and Instagram is one of the most genuinely supportive crafting communities online. Posting your easy decorating cake attempts and getting feedback from experienced decorators accelerates skill development dramatically compared to practicing in isolation.
Invest in your tools gradually. Start with the five essentials listed in section two. Add a turntable upgrade, then better piping tips, then a flower nail set. Buying everything at once creates overwhelm. Acquiring tools as you need them forces mastery of each before moving to the next level of easy decorating cake complexity.
Summary
Easy decorating cake ideas make it simple to create beautiful desserts without professional skills or expensive tools. Using frosting, sprinkles, fresh fruit, chocolate drizzles, and simple piping techniques, anyone can enhance a cake’s appearance. These beginner-friendly decorating methods save time while delivering attractive, memorable cakes for any celebration.
FAQ’s
Q1: What is the easiest frosting for easy decorating cake at home?
American buttercream — butter, powdered sugar, cream, vanilla — is the most forgiving and beginner-friendly frosting.
Q2: How do I prevent cake layers from sliding when decorating?
Apply a small dollop of frosting to the cake board before placing the first layer to act as an anchor.
Q3: How long should I chill a crumb-coated cake before the final layer?
At least 20 minutes in the refrigerator, or 10 minutes in the freezer — the coat must be firm to the touch.
Q4: Can I use store-bought frosting for easy decorating cake?
Yes, but add 1–2 tablespoons of softened butter to improve texture and pipability before decorating.
Q5: What’s the best way to color white buttercream without changing its consistency?
Use gel or paste food coloring — never liquid — and add it one small drop at a time.
Conclusion
Easy decorating cake is a learnable craft, not a natural gift. Master your crumb coat, control your buttercream temperature, and use the right tools — offset spatula, turntable, bench scraper. Practice one technique per session. Document your progress. Every professional cake decorator started exactly where you are right now.