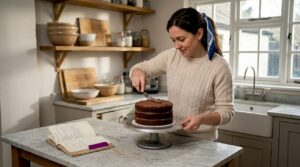
When I first started decorating cakes, I learned that patience mattered more than expensive tools. Practicing simple piping techniques helped me improve much faster than attempting complex designs right away. Small details like smoothing frosting properly made the biggest difference in the final look.
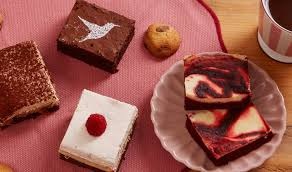
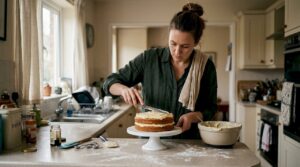
Cake decorating tips can help beginners and experienced bakers create beautiful, professional-looking cakes at home. From frosting techniques to creative designs, the right methods make decorating easier and more enjoyable. Want bakery-quality cakes at home?
Discover cake decorating tips that transform simple desserts into stunning edible masterpieces effortlessly.
Why Cake Decorating Tips Matter More Than Your Ingredients:
Every baker obsesses over the recipe. Flour ratios. Butter quality. Sugar types. But walk into any professional bakery and ask the decorators what separates their cakes from a home baker’s attempt — they’ll point to technique every single time.
Cake decorating tips are not optional polish on top of a good bake. They are the architecture of the finished product. A dry, dense cake with flawless decoration still sells. A perfectly moist cake slathered in sloppy frosting gets pushed to the back of the display case. That’s a cold truth, but it’s the truth.
The US cake decorating market is worth over $1.3 billion annually. That’s not driven by better recipes — it’s driven by presentation. Consumers pay premium prices for cakes that look like art. Learning the right cake decorating tips does not just make your bakes prettier; it makes them more valuable, whether you sell them or simply want to wow your family on a Sunday afternoon.
What I’ve noticed over years of decorating is that most people skip the foundational steps and jump straight to the fun stuff — the piped roses, the edible gold, the mirror glaze. But those techniques land beautifully only when the boring basics are locked in. So that’s exactly where we start.
Essential Tools Every Decorator Needs Before Attempting Cake Decorating Tips:
Before any technique makes sense, your toolkit has to be right. Using the wrong spatula or a flimsy turntable is like trying to paint a portrait with a house brush.
- Offset spatulas in two sizes (4-inch and 8-inch): The small one handles detail work and tight spaces; the large one moves bulk frosting efficiently without tearing the crumb.
- A heavy cast-iron or aluminum turntable: Cheap plastic ones wobble. That wobble transfers to your frosting. A stable turntable is the single best investment in these cake decorating tips.
- Bench scraper (also called a cake comb): This is how pros get those perfectly smooth sides. Run it against a spinning turntable, and the frosting levels itself.
- Piping bags and a starter coupler set: Reusable silicone bags are more controllable than disposable plastic ones for intricate work.
- A digital kitchen scale: Volume measurements fail in baking. Weight is repeatable, and repeatable results are the backbone of every professional cake decorating tip.
These five tools solve 80% of beginner problems before they even start.
Mastering the Crumb Coat — The Foundation of All Cake Decorating Tips:
Ask any pastry chef what separates amateur cakes from professional ones at first glance, and the answer is almost always the crumb coat. This thin layer of buttercream traps loose crumbs, creating a clean canvas for the final coat. Skip it, and stray brown crumbs appear in your pristine white frosting. Include it, and your finish looks straight out of a Manhattan patisserie.
Getting the crumb coat right takes patience. The technique itself is simple, but the execution requires discipline — especially resisting the urge to apply too much pressure or too thick a layer.
1: How to Apply a Crumb Coat Without Wrecking the Cake
Start with chilled cake layers. Cold cake firms up and resists tearing. Apply a thin, even smear of buttercream across every exposed surface — top, sides, and between layers. The layer should be so thin you can see the cake through it. That’s intentional.
2: Chilling the Crumb Coat to Lock in Structure
Immediately after application, place the cake in the refrigerator for at least 30 minutes. This step is non-negotiable in the context of these cake decorating tips. The buttercream sets hard, creating a rigid base. When you apply your final coat over a chilled crumb coat, the spatula glides instead of dragging.
3: Common Crumb Coat Mistakes to Avoid
Thick crumb coats are the most common error. Too thick and the outer coat has nothing to grip. The other common mistake is crumb coating a warm cake — the buttercream melts on contact and mixes with crumbs immediately, defeating the purpose entirely.
Buttercream Consistency — The Secret Ingredient Behind Every Professional Cake Decorating Tip:
Buttercream is your most versatile tool. It pipes, it spreads, it smooths, and it sculpts. But only when it’s the right consistency for the job at hand. This is one of those cake decorating tips that pros rarely spell out but beginners always need explained.
- Stiff consistency (for flowers and borders): Beat until the buttercream holds rigid peaks and holds shape without slumping. Add powdered sugar in small increments until it reaches this texture.
- Medium consistency (for piping rosettes and writing): Should hold shape when piped but have slight softness at the peak. This is the standard workhorse consistency.
- Soft/spreadable consistency (for crumb coating and smooth finishes): Should spread easily without tearing. Add a teaspoon of cream or milk at a time until you reach a peanut-butter-like texture.
- Color changes consistency: Adding gel food coloring to buttercream thickens it slightly. Always adjust with a tiny amount of liquid after coloring before piping.
- Temperature matters: Room temperature butter (65–68°F) produces the smoothest emulsion. Cold butter produces lumpy, greasy buttercream no matter how long you beat it.
Every one of these cake decorating tips about consistency will be rendered useless if the buttercream temperature is off. Work in a cool kitchen when possible.
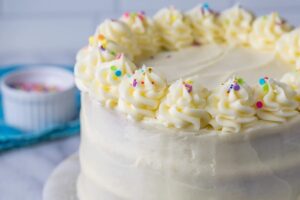
Smooth Sides Technique — One of the Most Valuable Cake Decorating Tips for Beginners:
The smooth-sided cake is the white whale for most home decorators. It looks effortless in tutorials and impossibly difficult in practice. But there’s a step-by-step methodology that makes it achievable for anyone who practices it three or four times.
The key insight — and this took me an embarrassingly long time to figure out — is that smooth sides require multiple thin passes, not one thick perfect application. Each pass refines what the previous one started.
1: The Hot Bench Scraper Method
Fill a tall glass with boiling water and dip your bench scraper in it for 30 seconds. Dry it completely, then press it lightly against the side of your frosted cake as you spin the turntable. The residual heat in the metal melts microscopic surface imperfections. Wipe the scraper clean, reheat, repeat. Three to four passes using this method produces a finish that rivals professional bakeries. Among all cake decorating tips involving tools, this one has the highest return on effort.
2: Fixing Gaps and Holes in the Final Coat
After your first full pass with the bench scraper, you’ll see divots and small holes where the frosting pulled away. Don’t panic. Dip a small offset spatula in warm water, dry it, and use the tip to dab a tiny amount of fresh buttercream into each gap. Do one final scraper pass to blend. These cake decorating tips about repair work are what separate the patient decorators from the frustrated ones.
3: The Paper Towel Trick for Final Smoothing
For an ultra-matte, silky finish, press a piece of clean parchment paper gently against the side of the cake and run your hand over it once. Peel back slowly. The parchment absorbs tiny surface air bubbles and levels the frosting without disturbing the coat beneath. This works best when the buttercream is still slightly soft — not fully chilled.
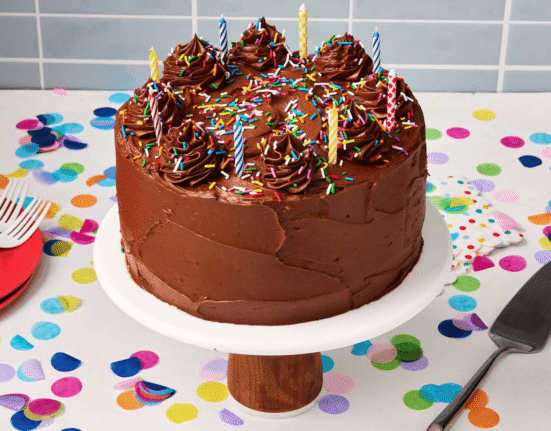
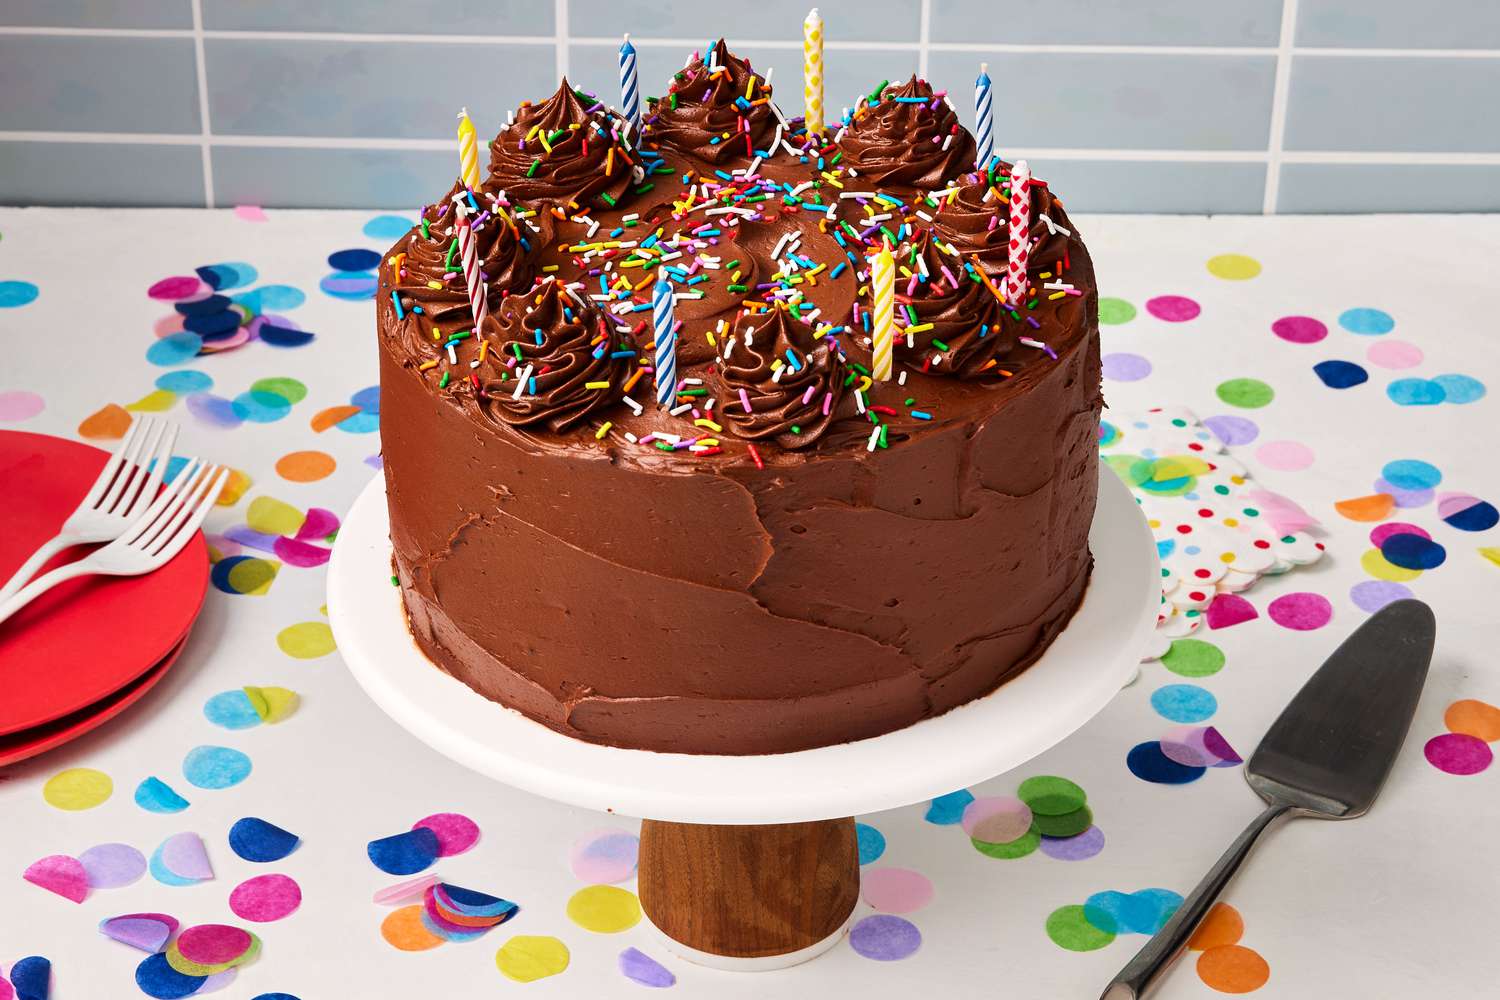
Piping Techniques — Turning Cake Decorating Tips Into Visual Art:
Piping is where cake decorating tips become a language. Every tip shape produces a specific visual result. The 1M star tip creates the classic swirl rose seen on grocery store cakes. The 104 petal tip builds layered ruffles. The 2D tip is responsible for those chunky, textured rosettes. The 6B open star makes dramatic, oversized swirls that photograph beautifully.
But tip selection is only 30% of the equation. The other 70% is angle and pressure control.
- For rosettes: Hold the bag at a 90° angle, apply steady even pressure, rotate your wrist counterclockwise, and stop pressure before lifting.
- For rope borders: Hold at a 45° angle, squeeze with consistent pressure while moving in a slight S-curve pattern.
- For writing: Use a #2 round tip, thin buttercream to a soft consistency, hold the bag at 45°, and let the frosting fall from the tip rather than pressing it into the cake.
- For drop flowers: Hold at 90°, squeeze, rotate tip clockwise while pressure is on, release pressure before lifting straight up.
- For basket weave: Alternate vertical lines with horizontal ribbons overlapping each vertical strip — this produces one of the most impressive-looking cake decorating tips techniques but requires patience and a consistent hand.
Practice these cake decorating tips by piping onto a flat sheet pan lined with parchment. Scrape it clean and repeat. Ten minutes of daily practice builds muscle memory faster than any tutorial.
Cake Decorating Reference Table :
| Technique | Skill Level | Time Required | Tools Needed | Best For |
| Crumb coat | Beginner | 15 min + 30 min chill | Offset spatula, turntable | All cakes |
| Smooth buttercream sides | Beginner–Intermediate | 30–45 min | Bench scraper, turntable | Tiered, celebration cakes |
| Rosette piping | Beginner | 10–20 min | 1M tip, piping bag | Cupcakes, simple cakes |
| Fondant covering | Intermediate | 45–60 min | Rolling pin, smoother tool | Wedding, sculpted cakes |
| Buttercream flowers | Intermediate | 60–90 min | Flower nail, petal tips | Floral cakes |
| Mirror glaze | Intermediate–Advanced | 2–3 hours (includes setting time) | Thermometer, rack, blender | Mousse cakes, entremets |
| Watercolor effect | Intermediate | 20–30 min | Paint brushes, gel colors | Artistic, abstract cakes |
| Geode effect | Advanced | 3–5 hours | Rock candy or isomalt | Showpiece cakes |
| Drip technique | Beginner | 10–15 min | Squeeze bottle, ganache | Drip cakes, naked cakes |
| Hand-painted details | Advanced | 60+ min | Food-safe brushes, luster dust | Custom, portrait cakes |
| Buttercream textures (palette knife) | Intermediate | 20–30 min | Palette knife | Rustic, painterly cakes |
| Stenciling | Beginner | 15 min | Cake stencil, scraper | Geometric, patterned cakes |
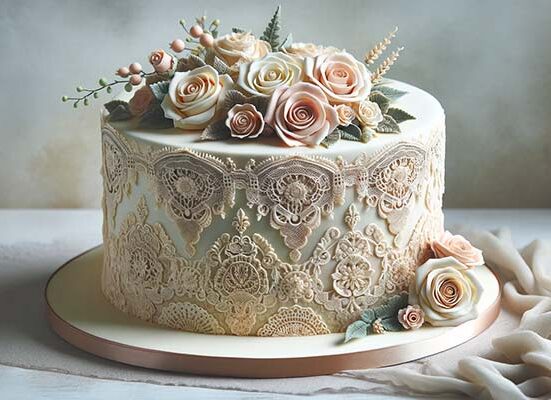
Fondant Fundamentals — Advanced Cake Decorating Tips for Sculptural Work:
Fondant intimidates people. That thick, pliable sugar paste has a reputation for being difficult to work with, prone to tearing, and — frankly — not always delicious. But fondant’s purpose isn’t flavor; it’s architecture. A fondant-covered cake can be sculpted, painted, stenciled, and detailed in ways that buttercream simply cannot support.
These cake decorating tips for fondant work start at the material level. Commercial fondant and homemade marshmallow fondant behave very differently. Most professionals I’ve spoken to prefer Satin Ice or Fondarific for commercial products, and homemade marshmallow fondant for more forgiving practice.
1: Prepping Your Cake for Fondant Coverage
The cake surface must be coated in a thin, smooth layer of buttercream before fondant goes on. This acts as an adhesive and creates a flat, even base. Chill the buttercream-coated cake until firm — at least one hour — before rolling fondant. A soft buttercream base will shift under the fondant and create lumps that can’t be smoothed out once the fondant is applied.
2: Rolling Fondant to the Right Thickness
Roll fondant on a lightly greased silicone mat or directly on a clean, cornstarch-dusted surface. Target a thickness of 1/8 inch (3mm). Too thin and it tears; too thick and it sags and wrinkles at the base. These specific cake decorating tips about thickness are rarely given in beginner tutorials, and skipping them causes more frustration than any other fondant step.
3: Smoothing and Finishing Fondant Without Air Bubbles
Use a fondant smoother (an acrylic paddle with a handle) in firm, circular motions starting from the top center and working down and outward. If a bubble appears, prick it with a clean pin at a 45° angle, gently press the air out, and smooth over it. The pin hole disappears completely once the fondant settles.
Color Theory for Cake Decorators — Cake Decorating Tips That Make Palettes Pop:
Color is where most home bakers make their biggest mistakes. Either everything’s too saturated (cakes that look aggressive and synthetic) or too muted (cakes that look like they’ve been left in the rain). Understanding a few basic color principles is one of those cake decorating tips that pays off in every single project.
- Use a maximum of three core colors per cake: One dominant, one supporting, one accent. Any more and the design reads as chaotic rather than complex.
- Gel colors are non-negotiable: Liquid food coloring thins your buttercream and produces weak, washed-out shades. AmeriColor and Cheermaster gel colors are the industry standards for professional cake decorating tips.
- Let colors rest: Mixed buttercream deepens in color as it sits. Mix your colored buttercream, cover it, and check the shade again after 30 minutes. What looks pale pink at first often becomes vivid magenta an hour later.
- Complementary colors create vibration: Pairing orange with blue or purple with yellow creates visual energy. These cake decorating tips about contrast are used deliberately in competition cakes to create immediate impact.
- Nude and muted palettes photograph best: For social media and professional photography, dusty roses, sage greens, and warm creams outperform bold primary colors in terms of engagement and perceived elegance.
Drip Cakes and Mirror Glazes — Modern Cake Decorating Tips for Contemporary Styles:
The drip cake exploded onto the cake world around 2015 and hasn’t left. What started as a single-flavor ganache drip has evolved into colored white chocolate drips, caramel drips, and even jam-based drips. The technique is beginner-accessible but demands precision in temperature.
These cake decorating tips for drip work center on one critical variable: ganache temperature. Too hot and the drips run all the way to the board, pooling at the base. Too cool and they barely move, producing stubby, unnatural-looking blobs.
1: Finding the Right Ganache Temperature for Drips
The ideal ganache temperature for a drip cake is between 90°F and 95°F. At this temperature, the ganache flows off a spoon in a slow, steady ribbon. Test it on the back of your chilled cake first — one test drip at the back edge. Watch how it travels. If it moves to the bottom of the cake within 5–8 seconds, the temperature is correct. Too fast means cool it briefly; too slow means warm it for 10-second microwave bursts and test again.
2: Mirror Glaze — The Most Advanced of the Modern Cake Decorating Tips
Mirror glaze requires a mousse cake (standard buttercream cakes absorb the glaze rather than allowing it to set on the surface). The glaze is poured at exactly 90°F over a frozen cake. The temperature differential causes it to set almost instantly, creating the signature reflective surface. The actual gelatin-based glaze recipe is secondary to understanding this thermal principle.
3: Color Swirling Techniques in Mirror Glaze
Multiple colored glazes poured simultaneously create the swirled, galaxy-like effects seen on viral cake posts. The technique requires all glaze colors to be at the same temperature when poured, and the cake must be placed on a wire rack over a sheet pan to catch runoff. Tilt the cake gently after pouring to encourage color migration — these cake decorating tips for mirror work are rarely explained in basic tutorials.
Seasonal and Themed Cake Decorating Tips for Every Occasion:
Themed cakes live and die by specific technique choices. A Christmas cake calls for completely different decoration strategies than a wedding cake or a Halloween sculpt. The core cake decorating tips remain the same, but application shifts based on visual intent.
For holiday cakes, edible luster dust transforms ordinary decorations. Gold and silver dust brushed over dried fondant accents creates a metallic finish that glitter cannot replicate. Apply it dry with a soft brush for a subtle shimmer or mix it with lemon extract for a painted metallic effect. Lemon extract evaporates fast, leaving only the metallic pigment behind.
Wedding cakes demand restraint. Every experienced wedding cake decorator will tell you the same thing: the cake decorating tips that matter most for weddings involve knowing what not to do. Overly complex piping, clashing colors, and competing textures all read as amateurish. The most expensive-looking wedding cakes are often the most minimal — smooth sides, fresh flowers, a single monogram.
Birthday cakes, especially for children, prioritize impact over refinement. Bold colors, dimensional figurines (made from gum paste or modeling chocolate), and statement toppers all work here. These cake decorating tips for children’s birthday cakes reward creativity over technical precision, which makes them excellent learning environments for new decorators.
Troubleshooting the 10 Most Common Cake Decorating Problems:
Real experience taught me that troubleshooting is the highest-value skill in cake decorating. You can memorize cake decorating tips all day, but when something goes wrong mid-project, you need to think on your feet.
Buttercream is greasy and separated: The butter was too cold. Fix by gently warming the bowl with a kitchen torch or hair dryer on low, beating constantly. It will re-emulsify.
Fondant is tearing: Either it was rolled too thin, the surface was too dry, or the cake was too cold and the condensation made the fondant slippery. Knead a small amount of shortening into the fondant to restore pliability.
Piped decorations are slumping: Buttercream too warm or too soft. Chill the piping bag in the refrigerator for 5 minutes before continuing. Cake layers are sliding: No dowels for support in a tiered cake, or the filling is too soft. Use cake boards between tiers and chill each tier completely before stacking.
Air bubbles in buttercream: Over-beating incorporates air. Switch to a paddle attachment on low speed for the final 2 minutes of mixing — this collapses air pockets. Among all cake decorating tips for texture issues, this one is most often overlooked.
Smooth sides develop a rough texture: The bench scraper was dirty or had dried frosting on it. Clean and warm the scraper between every pass without exception. Mirror glaze won’t set: The cake wasn’t frozen solid, or the gelatin ratio was off. Freeze cakes for a minimum of 4 hours — preferably overnight — before applying mirror glaze.
Writing looks shaky: Breathing affects hand steadiness. Exhale fully before each letter stroke and brace your elbow on a steady surface. These cake decorating tips about body mechanics sound trivial but produce real improvements.
Colors bleed into each other: Soft buttercream layers touching each other. Pipe adjacent colors on fully chilled surfaces and use a toothpick to define borders rather than allowing colors to touch when soft.
Cake looks amateur despite correct technique: Usually a proportion issue. Decorations are either too large or too small for the cake size. Scale every element to the tier it decorates. A 4-inch rosette looks perfect on a 10-inch cake and absurd on a 5-inch one.
Building a Practice Routine That Makes Cake Decorating Tips Second Nature:
Technique without repetition is just theory. Every professional decorator I have ever spoken to says the same thing: the gap between knowing a technique and executing it under pressure is closed only by deliberate practice.
Set aside one hour per week specifically for skill-building. Not baking a cake for an occasion — just practicing. Pipe on a sheet pan. Roll fondant over a foam dummy cake. Run a bench scraper over a Styrofoam cylinder coated in shortening. These cake decorating tips don’t require wasting cake or eating 300 cupcakes a week to master.
Build a progression. Spend month one on smooth buttercream technique only. Month two, add piping basics. Month three, introduce fondant. This structured approach mirrors how professional baking schools teach cake decorating tips — not through jumping around techniques, but through deliberate, layered mastery.
Document your practice. Photograph every cake, even the disasters. Looking back at your progression is one of the most powerful motivators in any craft. Those cracked fondant messes from week one look completely different after six months of consistently applying these cake decorating tips.
Join a community. The American Cake Decorating community, Cake Central forums, and countless active Reddit communities exist specifically to give decorators feedback, inspiration, and accountability. Share your work, invite critique, and take that feedback seriously. The best cake decorating tips often come from someone who’s made the same mistake three times and finally figured out why.
Summary
Cake decorating tips span a wide range of skills, from basic crumb coats and buttercream consistency to advanced fondant work and mirror glazes. The key to improvement is layered practice: master foundational techniques before adding complexity. With the right tools, temperature control, and deliberate repetition, professional-level results are achievable for any dedicated home baker.
FAQ’s
Q1: What is the single most important of all cake decorating tips for absolute beginners?
A: Master the crumb coat first — it fixes 80% of finish problems before they happen.
Q2: How do I stop my buttercream from forming a crust while I’m decorating?
A: Keep a damp cloth loosely draped over your bowl between uses to prevent surface drying.
Q3: Can I apply fondant over whipped cream frosting?
A: No — fondant requires a firm buttercream or ganache base; whipped cream is too soft and wet.
Q4: How many times should I practice a piping technique before using it on a real cake?
A: At least 20–30 repetitions on parchment paper before piping on a cake under any time pressure.
Q5: What temperature should my kitchen be when applying cake decorating tips that involve buttercream?
A: Aim for 68–72°F — warmer rooms soften buttercream too quickly and make smooth finishes nearly impossible.
Conclusion
These cake decorating tips work because they address real problems in a real sequence — tools first, foundation second, technique third, troubleshooting fourth. Master the crumb coat. Control your buttercream temperature. Invest in a proper turntable. Practice without the pressure of a deadline. The difference between a beautiful cake and a forgettable one is built in these fundamentals, not the glamorous flourishes you see on social media.