I love experimenting with cap cake decorations because even simple designs can make homemade treats look professionally crafted. Trying different frosting styles, sprinkles, and toppers always adds a creative touch to special occasions. The best part is seeing how small decorative details completely transform the final presentation.
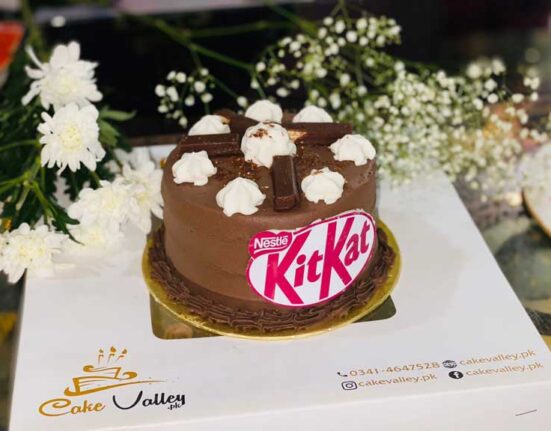
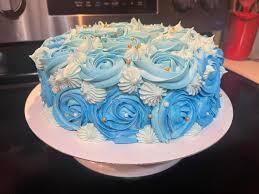
Cap cake decorations are creative elements used to enhance the appearance of cupcakes for parties, celebrations, and themed events. From elegant frosting designs to colorful toppers, decorations can make cupcakes both visually appealing and memorable.
Looking for stunning cap cake decorations? Discover creative ideas, colorful designs, and simple techniques to elevate every celebration.
Why Cap Cake Decorations Matter More Than Most Hosts Realize:
The mortarboard cap is the universal symbol of academic achievement. When it appears on a cake as a decoration, it signals occasion instantly — no text required, no explanation needed. That symbolic weight is exactly why cap cake decorations deserve more deliberate selection than a last-minute grab from the party supplies aisle.
Graduation cake searches peak hard each year in April and May, with Google Trends data confirming that “graduation cake decorations” and related terms experience 400–600% search volume spikes between late April and early June across the US. The market for cap cake decorations is large, seasonal, and flooded with products that vary wildly in quality, material safety, and visual impact. Knowing how to navigate it produces dramatically better results than buying on convenience alone.
The difference between cap cake decorations that photograph beautifully at every angle and ones that look cheap in three out of four shots comes down to material, scale, and placement — three variables that are entirely controllable with fifteen minutes of planning before purchase.
The 5 Main Types of Cap Cake Decorations and When to Use Each:
Cap cake decorations are not a monolithic product category. Five distinct types exist, each with specific advantages, limitations, and appropriate use cases.
- Fondant cap cake decorations — handcrafted from gum paste or fondant by the baker or purchased pre-made; fully edible, color-customizable, and the most visually elevated option for upscale graduation cakes.
- Plastic cap cake decorations — the most widely available and least expensive type; non-edible, reusable, and available in standard black or school-color variations at most party supply retailers.
- Acrylic and resin cap cake decorations — premium non-edible toppers often laser-cut or molded with fine detail; sharper visual clarity than plastic, suitable for formal celebration cakes where photography matters.
- Cupcake pick cap cake decorations — small paper or cardstock picks with printed or die-cut mortarboard graphics, inserted into individual cupcakes or along cake borders; economical and effective for large guest counts.
- Chocolate cap cake decorations — molded from tempered dark, milk, or white chocolate using silicone molds; edible, structurally stable, and highly customizable with colored cocoa butter details.
How to Make Fondant Cap Cake Decorations From Scratch:
Handcrafted fondant cap cake decorations are the most impressive version of this decoration type, and they are more achievable for home bakers than most guides suggest. The technique is straightforward — the challenge is in the proportions and the drying time, both of which are skipped over in most tutorials.
Before attempting fondant cap cake decorations, understand one operational reality: they require 24 to 48 hours of drying time before placement on the cake. Anyone starting the fondant caps the morning of the party is already too late for structural integrity. Plan the decoration timeline backward from the party start time, not forward from whenever you begin baking.
1: Shaping the Mortarboard Base
Roll black fondant or gum paste to approximately 4mm thickness. Cut a square using a ruler and pizza cutter — for a standard 8-inch round tier, a 2-inch square base reads correctly in proportion. Press the base onto a foam drying mat and allow it to stiffen slightly before attaching the cap crown. A flat base that is not pre-dried will warp when the crown is attached, producing cap cake decorations that tilt or collapse. If you are making six to eight caps for a tiered cake, cut all bases simultaneously and let them rest for two hours before proceeding.
2: Building the Cap Crown
The crown of the mortarboard is a small, slightly domed cylinder approximately 1 inch tall and 1 inch in diameter for a standard-sized decoration. Roll gum paste into a cylinder, taper it very slightly at the top, and allow it to pre-dry for thirty minutes before attaching it to the stiffened base with a dab of edible glue or water. Gum paste dries significantly firmer than standard fondant — this distinction matters for cap cake decorations because fondant crowns often sag under their own weight before drying completely.
3: Adding the Tassel Detail
The tassel is the finishing element that elevates fondant cap cake decorations from competent to genuinely impressive. Roll a thin snake of fondant in the graduation color — approximately 1.5mm diameter, 1.5 inches long. Press one end onto the center top of the mortarboard base with edible glue. Let it drape naturally to one side. For multi-strand tassels, roll three to five thinner strands and group them together. Add a tiny fondant button at the attachment point to cover the join. This detail is visible in photographs at close range and consistently draws the most complimentary comments on finished cap cake decorations.
Buying Cap Cake Decorations: What to Look for Before You Purchase:
Pre-made cap cake decorations span an enormous quality range. Price is a rough guide but not a reliable one — a $12 set of fondant caps from a custom Etsy baker outperforms a $25 retail resin set in visual impact and cake cohesion. These five evaluation criteria cut through the noise.
- Material safety for food contact — any cap cake decoration placed directly on or into a cake surface must be food-safe; non-edible decorations need a physical barrier (a fondant pad or parchment disc) between the decoration and the cake surface.
- Scale appropriateness — a cap decoration that is too large for the tier reads as an afterthought dropped from above; target cap width at roughly 20–25% of the tier diameter for visual balance.
- Base stability — check that the decoration’s base is flat enough to sit level on frosted surfaces; picks and toppers with curved or narrow bases shift under any vibration during transport.
- Color accuracy — school colors matter enormously to graduates and families; verify that pre-made cap cake decorations match the stated colors in good lighting before purchasing.
- Quantity per set — calculate how many caps you need for the full cake design (including any cupcakes) before ordering; running short means a mismatched second purchase from a different supplier.
Cap Cake Decorations for Cupcake Displays:
Graduation parties increasingly feature cupcake towers alongside or instead of tiered cakes, and cap cake decorations designed for cupcake insertion require different proportions and base construction than those designed for larger tier surfaces.
Standard cupcake pick cap cake decorations are 1 to 1.5 inches wide — small enough to sit proportionally on a standard cupcake crown without overhanging the paper liner. The material for picks is typically cardstock, wafer paper, or thin fondant. Each has a different interaction with the frosting surface, and understanding those interactions prevents the most common cupcake decoration failures: sinking, tilting, and moisture-induced collapse.
1: Cardstock Cap Picks: Pros and Limitations
Cardstock cap cake decorations are the most widely available and the easiest to source in custom school colors through online print services or Etsy. They are inserted on a wooden or paper stick and press into the cupcake frosting cleanly. The limitation is moisture: cardstock picks placed more than two hours before service begin absorbing ambient frosting moisture and soften at the base, eventually tilting. Insert cardstock cap cake decorations no more than ninety minutes before guests arrive.
2: Wafer Paper Cap Decorations for Cupcakes
Wafer paper cap cake decorations are fully edible and dissolve cleanly into the frosting surface over time rather than becoming soggy. They are more visually delicate than cardstock — translucent when held up to light — which suits elegant, pastel-palette graduation parties better than casual backyard events. Print wafer paper cap cake decorations using an edible ink printer with a food-safe wafer paper substrate; most local print-on-demand bakery suppliers can produce custom designs within 48 hours.
3: Fondant Cap Picks on Cupcakes
Small fondant cap cake decorations on toothpick or lollipop stick bases are the most visually elevated cupcake decoration option. Make them the same way as full-scale fondant caps but at 50% proportional size. Dry them completely — minimum 48 hours — before inserting into cupcakes. Fondant caps that are not fully dry will slide on the stick and collapse against the cupcake surface under their own weight, ruining the display.
Matching Cap Cake Decorations to the Overall Graduation Cake Design:
Cap cake decorations that clash with the cake’s color palette, frosting texture, or tier proportion look like an afterthought — because they usually were. Cohesive design is not difficult, but it requires making the cap decoration decision before the cake is frosted, not after.
- Match the tassel color to the cake’s accent frosting — if the cake uses a royal blue border piping, blue tassels on the cap cake decorations create visual continuity across the entire design.
- Mirror the cap’s board finish to the cake surface — a smooth fondant-finished cap looks incongruous on a heavily textured rustic buttercream cake; match surface quality across all elements.
- Scale the cap proportionally to the tier — on a six-inch top tier, one cap centered at the apex reads correctly; on a ten-inch bottom tier, three or four caps clustered reads as intentional abundance rather than crowding.
- Coordinate metallic accents — gold tassel caps pair naturally with gold luster dust borders; silver tassel cap cake decorations suit silver dragée-bordered tiers or silver ribbon wrapping.
- Consider negative space — a single large fondant cap on a clean white-frosted tier with a monogram script reads as modern and intentional; cap cake decorations do not need to fill every surface to create impact.
| Cap Decoration Type | Edible | Avg. Cost (per 6-pack) | Drying Time Required | Best For | School Color Options |
| Fondant / Gum Paste (handmade) | Yes | $18–$45 (custom) | 24–48 hours | Tiered custom cakes | Fully custom |
| Fondant (pre-made, purchased) | Yes | $12–$28 | None (ready) | Home bakers, time-limited | Limited standard colors |
| Chocolate molded | Yes | $8–$20 (DIY materials) | 30–60 min (set time) | Tiered cakes, cupcakes | Custom with cocoa butter |
| Plastic topper | No | $3–$10 | None | Budget events, casual parties | Black standard, limited color |
| Acrylic / Resin topper | No | $10–$25 | None | Formal celebrations, photography | Custom laser-cut |
| Cardstock cupcake picks | No | $4–$12 | None | Cupcake towers, large guest counts | Fully custom printable |
| Wafer paper picks | Yes | $8–$18 | None (pre-printed) | Elegant parties, pastel palettes | Fully custom printable |
| Paper straw + fondant cap | Yes (cap only) | $5–$10 DIY | 24 hours | Budget cupcake displays | Custom fondant |
DIY Cap Cake Decorations Using Chocolate Molds:
Chocolate cap cake decorations occupy a category that home bakers consistently overlook — and consistently underestimate. With a quality silicone mold and properly tempered chocolate, a beginner can produce twelve identical chocolate caps in under two hours, with a visual result that rivals professionally purchased fondant alternatives.
Silicone mortarboard molds designed for chocolate are widely available through Etsy, Amazon, and specialty baking supply retailers. They range from $8 to $22 per mold set and typically produce caps in one or two sizes. The visual quality of chocolate cap cake decorations depends almost entirely on the chocolate tempering process and mold filling technique — not on skill level or specialized equipment.
1: Tempering Chocolate for Clean-Release Caps
Untampered chocolate produces cap cake decorations with a dull, streaky surface and a soft texture that does not hold detail at room temperature. Tempered chocolate releases from silicone molds with a glossy, sharp-edged finish that looks professionally made. The simplest home tempering method — tabling is impractical for small batches — is the seeding method: melt 200g of dark chocolate to 122°F, remove from heat, add 50g of finely chopped solid chocolate, and stir until the temperature drops to 88–90°F. Pour immediately into the mold cavities.
2: Adding School Colors With Cocoa Butter
White cocoa butter colorants — available in gel or powdered form from specialty suppliers — painted into the mold cavities before pouring the chocolate base produce cap cake decorations with colored tops and details. Paint the mortarboard board cavity with colored cocoa butter, allow it to set for five minutes in the refrigerator, then pour tempered dark or white chocolate over the top. When released, the color appears on the surface of the cap with clean edge definition. This technique produces custom-colored cap cake decorations at a fraction of the cost of professionally made fondant alternatives.
Common Cap Cake Decoration Mistakes That Ruin the Final Result:
Every one of these mistakes is preventable. They recur at graduation parties every year because the decision to decorate is rushed and the research is skipped.
- Placing non-food-safe caps directly on cake surface — plastic and acrylic cap cake decorations contain materials that should not contact edible surfaces; always use a fondant disc or food-safe acetate barrier.
- Using undried fondant caps — soft fondant cap cake decorations placed on the cake more than an hour before serving droop, crack, and lose their sharp edges as they absorb surface moisture.
- Ignoring cap-to-tier scale — a cap decoration that spans more than 30% of the tier diameter dominates the design and looks cartoonish rather than celebratory.
- Placing caps too close together — overlapping or tightly clustered cap cake decorations on a small tier create visual clutter; three caps on a six-inch tier is the practical maximum.
- Choosing color by eye from a screen — school colors look different on monitor displays than they do in person under party lighting; order a physical sample or test a fondant batch against actual school merchandise before committing.
Cap Cake Decorations for Multi-Tier Graduation Cakes:
Multi-tier graduation cakes present a specific design challenge: how to distribute cap cake decorations across multiple tiers without creating visual imbalance or structural instability. The answer lies in understanding weight distribution and visual hierarchy simultaneously.
The top tier is the traditional placement zone for the primary cap cake decoration — one large, high-quality fondant or acrylic cap centered at the apex reads as a ceremonial crowning element. Secondary tiers accommodate smaller cap cake decorations as accent elements, not duplicates of the top tier statement piece.
1: Cascading Cap Arrangements on Tiered Cakes
A cascading arrangement of cap cake decorations across multiple tiers creates visual movement — the eye travels upward from a cluster of smaller caps on the base tier through progressively fewer, larger caps toward the top. This arrangement works best on three-tier cakes where each tier carries a different cap size: small picks on the bottom, medium fondant caps on the middle, a single statement cap on the top. The visual rhythm reads as deliberate and designed rather than randomly distributed.
2: Integrating Diplomas and Books With Cap Cake Decorations
Cap cake decorations at their most impactful are paired with complementary fondant elements — small rolled diploma scrolls, miniature book stacks, or number elements representing the graduation year. These supporting fondant elements, placed on lower tiers alongside smaller cap cake decorations, build a complete academic narrative across the cake design. Color-coordinating all fondant elements — caps, diplomas, and accent text — in the graduate’s school colors produces the most cohesive and professionally designed result.
Where to Source Custom Cap Cake Decorations for School-Specific Colors:
Generic black-cap-with-yellow-tassel decorations serve when school colors are unknown or irrelevant. For families who care about color accuracy — and most do — custom sourcing is necessary and more accessible than most people realize.
Etsy is the primary marketplace for custom school-color fondant and chocolate cap cake decorations made to order. Search by graduation year, school color combination, and material type. Filter by estimated delivery date early enough to allow buffer time — most custom fondant cap cake decorations require five to seven business days of production plus shipping. Verify the seller’s reviews specifically for color accuracy rather than general quality; those are different attributes and reviewers often address them separately.
Local custom bakeries are an underused source for cap cake decorations for buyers who want to physically verify colors before commitment. Call the bakery directly, describe the school colors with specific reference points — royal blue and gold, not just “blue and yellow” — and ask whether they can produce a test piece before the full order.
Storing Cap Cake Decorations Before the Party:
Fondant and chocolate cap cake decorations are sensitive to humidity, temperature, and light in ways that plastic and acrylic decorations are not. Storage decisions made in the 24 to 72 hours before the party determine whether decorations arrive on the cake in pristine condition or show damage before the first photo is taken.
Fondant cap cake decorations should be stored in a cardboard box — never a sealed plastic container, which traps humidity and causes fondant surfaces to sweat and soften. Place each cap in a separate paper cupcake liner inside the box to prevent contact damage during storage. Store at room temperature away from direct sunlight; refrigerator storage causes fondant to sweat dramatically when brought back to room temperature, streaking colors and softening edges.
Chocolate cap cake decorations store best in a sealed container in a cool, dry environment between 60 and 65°F. Do not refrigerate unless the room temperature exceeds 75°F — refrigerator humidity causes chocolate to bloom (surface whitening), which dulls the glossy finish that makes chocolate cap cake decorations so visually compelling.
Cap Cake Decorations for Non-Traditional Graduation Celebrations:
Graduation extends beyond high school and college. Trade school completions, doctoral defenses, military promotions, and professional certification achievements all represent occasions where cap cake decorations are entirely appropriate — and where the visual design can be customized more specifically than off-the-shelf graduation party products allow.
Doctoral and professional graduation cakes often feature cap cake decorations in the field-specific color — doctoral gowns carry discipline-coded hood colors that vary significantly from the standard black. An Education PhD graduation cake might feature light blue cap cake decorations; a Medical graduation cake might feature green. These color codes are defined by the American Council on Education’s academic color chart, and incorporating them into cap cake decorations demonstrates a level of personal attention that families of advanced-degree graduates deeply appreciate.
Summary
Cap cake decorations are the most symbolically loaded element of any graduation cake, and they deserve deliberate material selection, proper sizing, and design integration. From handcrafted fondant and tempered chocolate caps to custom-printed wafer paper cupcake picks, the range of available cap cake decorations gives every home baker and event planner the tools to produce a celebration cake that photographs beautifully and honors the graduate’s achievement authentically.
FAQ’s
Q1: Are plastic cap cake decorations safe to place directly on a cake?
No — always place a food-safe fondant disc or parchment barrier between non-edible cap cake decorations and the cake surface.
Q2: How far in advance can I make fondant cap cake decorations?
Fondant caps can be made up to two weeks ahead and stored in a dry cardboard box at room temperature.
Q3: What size should cap cake decorations be for a standard 8-inch round cake?
A cap width of 1.5 to 2 inches reads correctly in proportion on a standard 8-inch round tier.
Q4: Can I get cap cake decorations in custom school colors?
Yes — Etsy sellers, local custom bakeries, and DIY fondant or chocolate methods all support full custom school-color matching.
Q5: Do cap cake decorations work on buttercream or only on fondant-covered cakes?
Cap cake decorations work on both surfaces; use a fondant pad base to stabilize any topper placed on soft buttercream.
Conclusion
Cap cake decorations succeed when chosen deliberately — matched to the cake’s scale, coordinated to school colors, made from appropriate materials, and placed with enough drying or setting time to hold their form through the celebration. Select your decoration type first, build the rest of the cake design around it, and the result will be a graduation cake that genuinely honors the occasion.