I started with easy cake decorating using simple buttercream swirls and colorful sprinkles. The process was fun, stress-free, and helped me gain confidence in my baking skills. Over time, I learned that even small decorative touches can make a cake look professionally made.
Easy cake decorating allows anyone to create beautiful cakes without professional baking skills. With simple techniques and basic tools, you can transform ordinary cakes into stunning creations.
Discover easy cake decorating ideas that turn simple cakes into eye-catching masterpieces using basic tools, creativity, colors, and fun.
Why Easy Cake Decorating Is More Accessible Than You Think:
The barrier to entry here is almost zero. You don’t need a commercial kitchen, a pastry degree, or a drawer full of expensive tools. The fundamentals of easy cake decorating come down to understanding three things: surface prep, consistency of your medium, and confidence in your hand pressure.
Walk into any serious baker’s kitchen and ask them what they wish they’d known at the start. Almost universally, the answer involves frosting temperature. Too warm and your buttercream slides; too stiff and it tears the crumb. Get that dialed in and half the battle is already won. The other half is just repetition — which, in easy cake decorating, is genuinely enjoyable practice.
The American baking market tells an interesting story here. Home baking supply sales grew over 30% between 2020 and 2023, with piping tips and decorating kits leading category growth. Millions of people are attempting this. The ones who succeed fastest aren’t the ones with the most natural talent — they’re the ones who learned a structured approach from the beginning.
The Tools That Actually Matter for Easy Cake Decorating:
You’ll read lists elsewhere with 40 items. Ignore them. For genuine, stress-free easy cake decorating at home, this is what moves the needle:
- An offset spatula (4.5-inch): The single most impactful tool for smooth frosting application — far more control than a straight knife.
- A rotating turntable: Even a $15 plastic one from Amazon cuts your finishing time by half and produces more consistent results.
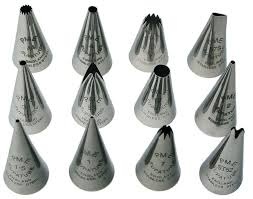
- Three piping tips to start: A round tip (Wilton 1A), a star tip (1M), and a petal tip (104) — between them, you can execute 80% of classic easy cake decorating looks.
- A bench scraper: For sharp sides on buttercream cakes, this tool is non-negotiable; drag it once around the spinning turntable and the result looks professional.
- Disposable piping bags: Reusable bags are fine long-term, but beginners should start disposable bags to eliminate the variable of a leaking, improperly-sealed bag mid-decoration.
Buttercream Basics: The Foundation of Every Easy Cake Decorating Project
Buttercream is where most beginners either build confidence or lose it entirely. Understanding what’s happening chemically — not just procedurally — makes you a faster learner and a better troubleshooter on the fly.
When you cream butter and powdered sugar together, you’re not just mixing. You’re incorporating air into fat molecules. That air is what makes American buttercream spreadable rather than greasy. The ratio that works best for easy cake decorating purposes is 1 cup of room-temperature unsalted butter to 3 to 3.5 cups of sifted powdered sugar, with 2–3 tablespoons of heavy cream added one tablespoon at a time.
There’s a specific texture to aim for before you touch your cake — what professional decorators call “peanut butter consistency.” It should hold a peak when you pull the spatula away, but that peak should curl slightly rather than stand rigid. Rigid buttercream tears crumbs. Loose buttercream sags. Easy cake decorating lives in the middle.
1: American Buttercream
The most forgiving formula in easy cake decorating. All-butter, powdered sugar, cream, a pinch of salt, and vanilla. Crusts slightly after sitting, which actually makes it easier to smooth. The crust is your friend — run a piece of parchment paper lightly over the surface after 10 minutes and it flattens to a near-mirror finish.
2: Swiss Meringue Buttercream
More effort, but a dramatically silkier result. You cook egg whites and sugar over a double boiler to 160°F, then whip to stiff peaks before adding butter one tablespoon at a time. The result is less sweet and incredibly stable — ideal for easy cake decorating in warmer climates or summer months.
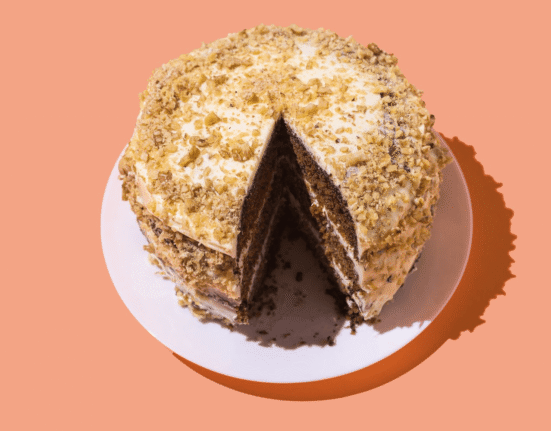
3: Cream Cheese Frosting
Underrated in easy cake decorating circles. The key: your cream cheese must be full-fat and genuinely cold, not room temperature. Cold cream cheese whipped with room-temperature butter creates a frosting that holds its shape better than you’d expect, works beautifully with carrot, red velvet, or spiced cakes, and pipes clean with a star tip.
The Crumb Coat — The Step Most Beginners Skip:
Every professional easy cake decorating tutorial mentions it. Most beginners still skip it. A crumb coat is a thin, rough layer of frosting applied first and then chilled for 15–30 minutes before the final coat goes on.
Here’s why it’s mandatory, not optional:
- It seals loose crumbs into a stable base so they don’t contaminate your final, visible layer.
- It reveals structural problems — if your layers are uneven, you’ll see it in the crumb coat and can fix it before the outer frosting goes on.
- It extends your working time on the final coat because you’re not fighting crumbs or a sticky surface.
- It makes the finished result look 3–4x more professional with zero additional skill required.
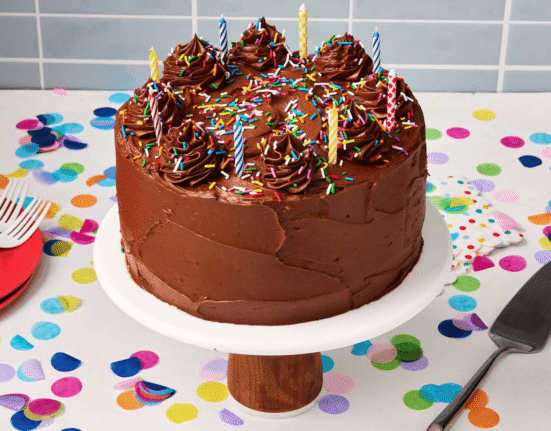
- It’s especially critical for chocolate cake because dark crumbs in white or pastel frosting are immediately visible and very hard to hide without starting over.
Piping Techniques That Define Easy Cake Decorating at Home:
Piping is the part that looks hardest from the outside and feels easiest once your hands understand the mechanics. The core insight: pressure controls size, height controls shape, and angle controls direction. Once you internalize those three variables, you can execute any piping pattern in easy cake decorating.
Before you touch the cake, spend 10 minutes piping on parchment paper. Seriously. This is the single practice drill that compresses months of trial-and-error into one focused session. You’re not wasting frosting — you’re banking confidence.
1: The Classic Rosette
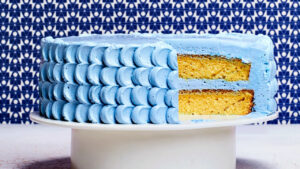
The signature move of easy cake decorating. Use a 1M star tip. Hold your bag perpendicular to the surface, apply steady pressure, and move in a tight counterclockwise circle starting from the center outward, ending where you began. Release pressure before you lift. The rosette should have a clean center with spiral arms that radiate outward evenly. Practice this ten times on parchment first — by the tenth one, your hand has the pattern memorized.
2: The Ruffle Border
Use a petal tip (104) with the thin edge facing outward. Hold the bag at a 45-degree angle to the surface and move in a rapid side-to-side rocking motion as you travel around the cake’s edge. The rocking is the key — without it, you get a flat ribbon; with it, you get genuine ruffles. This technique looks dramatically advanced but is one of the more forgiving patterns in easy cake decorating because slight imperfections read as intentional texture.
3: Shell Borders
The workhorse of easy cake decorating borders. Star tip, 45-degree angle, squeeze-release-pull. Each shell begins where the previous one ended. The result is a continuous, interconnected border that hides any gap between the cake and board, looks clean from every angle, and takes about three minutes to execute on a standard 8-inch cake.
Color Theory for Easy Cake Decorating Success:
Color is what makes a decorated cake look considered versus thrown together. You don’t need an art background — you need four rules.
First: always use gel food coloring, never liquid. Liquid coloring dilutes your frosting’s consistency and produces washed-out colors even at high volumes. Gel coloring delivers saturated pigment with a toothpick-sized amount.
Second: mix your colors 30 minutes before you need them. Gel colors “bloom” — they deepen significantly as they sit. What looks pale pink at mixing becomes a solid blush pink 20 minutes later. This catches beginners constantly and is one of the most consistent sources of color-matching frustration in easy cake decorating.
Third: to make clean white frosting, use shortening for half the butter in your recipe. Pure butter frosting is always slightly yellow, which muddies pastels and makes white look cream-colored. Half-and-half gives you a neutral base.
Fourth: when creating a palette for a cake, choose one dominant color, one supporting color, and one accent. Three colors, deliberately chosen, read as intentional design. Four or more colors without a clear plan reads as chaotic — regardless of how good the piping technique is.
Easy Cake Decorating Techniques: Quick Reference Table:
| Technique | Skill Level | Tools Required | Time to Execute | Best For |
| American Buttercream Smooth Coat | Beginner | Offset spatula, turntable, bench scraper | 20–30 min | All-purpose cakes, birthdays |
| Rosette Design (full coverage) | Beginner | 1M tip, piping bag, turntable | 15–20 min | Celebration cakes, floral themes |
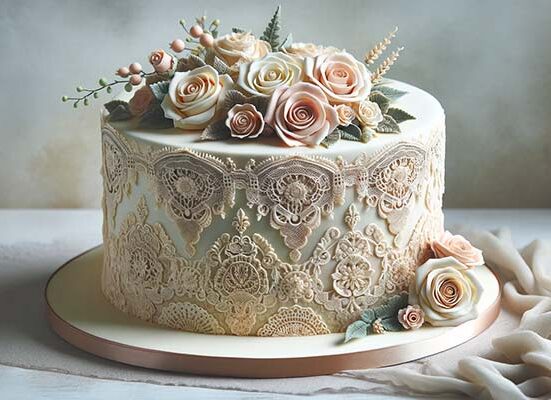
| Ruffle Border | Beginner–Intermediate | Petal tip 104, piping bag | 10–15 min | Elegant/wedding-style cakes |
| Ombre Gradient Frosting | Intermediate | Offset spatula, bench scraper, 3 frosting tones | 30–40 min | Modern aesthetic, birthdays |
| Drip Glaze | Beginner | Squeeze bottle or spoon, ganache | 5–10 min | Dramatic finish with minimal skill |
| Fondant Covering | Intermediate | Rolling pin, smoother, fondant | 45–60 min | Sculpted/themed cakes |
| Naked Cake Style | Beginner | Offset spatula | 10 min | Rustic weddings, minimal style |
| Buttercream Texture (palette knife) | Beginner | Palette knife | 15 min | Abstract/painterly look |
| Stenciling with Powdered Sugar | Beginner | Stencil, sifter | 5 min | Quick holiday designs |
| Sprinkle Application | Beginner | Hands, bowl | 3–5 min | Kids’ cakes, fun finishes |
| Piped Lettering | Intermediate | Round tip 2 or 3 | 10–20 min | Personalized messages |
| Edible Image Transfer | Beginner | Edible printer sheet | 5 min | Custom themed cakes |
The Drip Technique: Dramatic Easy Cake Decorating With Minimal Skill
The chocolate drip became the defining aesthetic of easy cake decorating on social media for good reason — it requires almost no piping skill, takes under ten minutes, and produces a result that photographs beautifully and impresses people who don’t bake.
Science matters here. Your ganache ratio for drips is typically 1:1 (chocolate to heavy cream) by weight for dark chocolate, or 2:1 (chocolate to cream) for white chocolate, which is thinner by nature. The temperature of both your ganache and your frosted cake determines whether your drips run long and dramatic or stay short and controlled.
1: Getting the Drip Consistency Right
Test your ganache on the side of a cold glass before touching the cake. It should run slowly — taking 3–4 seconds to travel one inch. Too fast means your ganache is too warm or too thin; let it cool. Too slow means it’s too thick and will blob rather than drip; warm it in 5-second microwave bursts. This is the most critical variable in easy cake decorating drip work.
2: Applying the Drip Without Mistakes
Your frosted cake must be cold — straight from the refrigerator, at least 15 minutes of chill time. Warm frosting causes the ganache to run uncontrollably because there’s no resistance at the surface. Pour your tested ganache into a squeeze bottle for precision, or use a spoon for a more organic look. Work around the top edge first, pushing small amounts over the lip every inch or so, then flood the top surface and spread gently with an offset spatula. The drips find their own path — that’s the whole point.
3: Coloring Your Drip
White chocolate ganache takes gel coloring exceptionally well, opening up every color option for easy cake decorating. Add coloring after the ganache is made and slightly cooled, mix thoroughly, then test consistency again before application — gel can slightly thicken the mixture.
Fondant: What It Is and When Easy Cake Decorating Actually Calls for It
Fondant has a reputation problem. People taste it at weddings, find it bland and chewy, and write off the entire medium. That’s a mistake, because as a structural tool in easy cake decorating, fondant is genuinely impressive — it gives you clean edges, smooth surfaces, and the ability to sculpt details that buttercream simply cannot hold.
Here’s the honest picture of when fondant is worth it versus when it isn’t:
- Use fondant for: Sculpted figures, sharp geometric designs, multi-day display cakes, themed kids’ cakes with specific character shapes.
- Skip fondant for: Taste-first events, hot weather (fondant sweats in humidity), cakes that need to be made more than 3 days ahead.
- Pre-made vs. homemade: Store-bought Satin Ice or Wilton fondant works perfectly for easy cake decorating at home — homemade marshmallow fondant tastes better but requires more handling experience.
- The key to good coverage: Roll fondant to 1/8-inch thickness on a lightly cornstarched surface, drape it over the cake starting from the top, and smooth outward and downward to eliminate air pockets before trimming the base.
- Coloring fondant: Knead gel coloring in with gloved hands — this is one of the genuinely messy parts of easy cake decorating, but the result is completely custom color at any saturation level.
Naked Cakes and Semi-Naked Styles in Modern Easy Cake Decorating:
The naked cake trend arrived around 2014 and never fully left — and for beginners, it’s the single most forgiving finishing technique in easy cake decorating. The concept: apply your crumb coat, don’t apply a final coat, and let the layers show deliberately through a thin veil of frosting.
What makes it work isn’t sloppiness — it’s intentionality. The exposed layers should be straight, even, and consistent. The thin frosting should be applied with the bench scraper in one clean pass at the right pressure. Imprecision reads as rustic; sloppiness reads as unfinished. The distinction is entirely in your prep work.
1: Choosing the Right Cake for Naked Style
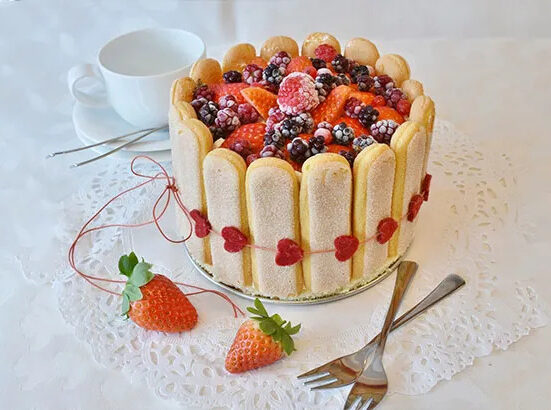
Not every bake suits the naked approach. Easy cake decorating in this style works best with cakes that have visual contrast between their layers and their filling. Chocolate cake with vanilla buttercream, carrot cake with cream cheese frosting, lemon cake with raspberry jam — each creates a visible stripe of color at each layer that becomes the visual interest of the design.
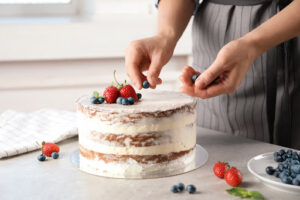
2: Decorating the Naked Cake Surface
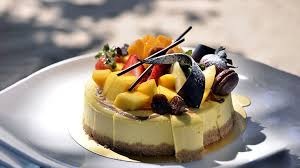
Fresh flowers, fresh fruit, and greenery are the go-to finishes for naked cakes — and they’re largely self-arranging. Pile them at the top off-center, let a few elements cascade down one side, and stop before it looks crowded. This is easy cake decorating at its most naturally beautiful, because you’re essentially doing floral arrangement on a cake board.
3: Making It Feel Finished
The most common mistake with naked cakes in easy cake decorating is leaving the base exposed. A simple shell or dot border around the bottom edge where the cake meets the board finishes the look immediately. It signals that the minimal frosting is a design choice, not an oversight.
Sprinkles, Edible Glitter, and Easy Texture Finishes:
Sprinkles are among the most underrated tools in easy cake decorating. Applied thoughtfully, they read as sophisticated. Applied carelessly, they look like a child’s birthday. The difference is almost entirely in how they’re applied.
The professional trick: pour your sprinkles into a shallow bowl, frost your cake normally, then hold the cake over the bowl and gently press handfuls of sprinkles against the lower third of the cake’s sides. Gravity does the rest — excess falls back into the bowl. The result is a clean, graduated sprinkle application that looks intentional and polished.
Edible glitter is a separate category. Lustre dust (metallics like gold and silver) applied with a dry food-safe brush adds a genuine shimmer to buttercream without altering its texture. This is one of the fastest ways to elevate a basic easy cake decorating project into something that looks high-end.
Textured finishes with a palette knife — sometimes called “painterly buttercream” — require no piping skill at all. Apply an extra-thick coat of buttercream, then use a small offset or palette knife in quick, confident swipes and swirls to create an abstract surface. No two cakes look identical, imperfections read as artistic, and the entire process takes about 8 minutes.
Common Easy Cake Decorating Mistakes and How to Fix Them:
Every mistake in easy cake decorating is recoverable. This is one of the medium’s great gifts — frosting can be scraped, rinsed, re-applied, and reworked almost indefinitely before it sets.
Frosting that’s tearing the cake surface means one thing: your crumb coat wasn’t cold enough or your final frosting is too stiff. Stop, refrigerate for 15 minutes, thin your frosting by one tablespoon of cream, and try again. Piping that looks uneven or inconsistent usually comes from inconsistent pressure on the bag — the fix is grip, not technique. Hold the bag from the top, not the middle, and squeeze with your dominant hand while guiding with your non-dominant hand.
Colors that look muddy or brown are almost always the result of mixing complementary colors accidentally. In easy cake decorating, always tint your frosting from white rather than trying to correct an existing color by adding more pigment — it never works the way you’d expect.
If your cake is leaning or sliding, the filling between layers is too thick, too warm, or too slippery. The fix for future cakes: pipe a buttercream dam around the inner edge of each layer before adding filling. The dam holds everything in place structurally. For a cake that’s already leaning, refrigerate it immediately, allow it to set completely, then assess whether it’s structural or purely visual.
Building a Consistent Easy Cake Decorating Practice Over Time:
Skill in easy cake decorating compounds faster than almost any other culinary discipline because the feedback loop is immediate and visual. You decorate a cake, you see exactly what worked and what didn’t, and you adjust on the very next attempt.
The decorators who get good fastest share one habit: they pick one technique per baking session and drill it deliberately rather than attempting a new design from scratch every time. Spend one Saturday practicing rosettes only. Spend the next one practicing drips only. By the third session on each technique, your hands know what your brain is asking for before you consciously direct them.
Invest in a simple notebook. Not a digital one — a physical one. After each easy cake decorating session, write two things: what went wrong and one specific change you’ll make next time. This practice compresses your learning curve dramatically because it forces you to articulate the problem rather than just moving on.
Find your community. The easy cake decorating space online — particularly on Instagram, Tikor, and YouTube — is genuinely generous. Post your cakes, tag the techniques you used, and ask specific questions. The feedback you get from other decorators who’ve hit the same walls is worth more than any instructional book.
Summary
Easy cake decorating is a simple and enjoyable way to transform ordinary cakes into attractive desserts. Using basic techniques such as frosting swirls, sprinkles, fresh fruits, and chocolate accents, beginners can achieve impressive results. With creativity, patience, and a few decorating tools, anyone can create beautiful cakes for birthdays, holidays, and special celebrations.
FAQ’s
Q1: What is the easiest cake decorating technique for total beginners?
The naked cake style — thin frosting, bench scraper finish, fresh flowers — requires almost no piping skill and consistently looks beautiful.
Q2: How do I make my buttercream smooth for easy cake decorating?
Chill the crumb coat fully, apply your final layer, then drag a hot bench scraper (dipped in hot water and dried) around the spinning turntable.
Q3: Can I do easy cake decorating without a piping bag?
Yes — zip-lock bags with a corner snipped off work well for simple designs, and spatula texturing requires no bag at all.
Q4: How far in advance can I decorate a cake?
Buttercream-decorated cakes can be refrigerated up to 3 days ahead; fondant-covered cakes up to 5 days, stored in a cool, dry place.
Q5: What food coloring is best for easy cake decorating at home?
Gel food coloring from brands like AmeriColor or Cheermaster — highly concentrated, won’t thin your frosting, and produces vivid, consistent results.
Conclusion
Easy cake decorating rewards patience, repetition, and curiosity more than raw talent. Start with American buttercream, master the crumb coat, and drill one piping technique at a time. Your first cake won’t be perfect — but your fifth will surprise you, and your tenth will make someone else want to learn. Start this weekend.