I watched a catering assistant in Portland transform four grocery store cakes into visually cohesive celebration desserts in under forty minutes using nothing but fresh strawberries, a paring knife, and a pastry brush — every cake sold out before any other dessert at the buffet. The single most consistent observation I make at baking classes: people who learn to decorate cake with strawberries.
Learning to cake with strawberries is one of the highest-return skills a home baker can develop — the fruit is affordable, widely available, and produces results that photograph like professional pastry work.
Every technique covered here to decorate cake with strawberries requires no specialist equipment and produces results guests will photograph before cutting.
Why Strawberries Are the Most Effective Natural Cake Decoration:

Fresh strawberries hit a rare combination of qualities that makes them the most practical natural decoration material in any home baker’s arsenal. The red-to-green color contrast is vivid and immediate. The surface moisture level, when properly managed, allows them to sit on frosted surfaces without sliding. And the flavor compatibility with virtually every cake base and frosting type eliminates the combinatorial guesswork that plagues other decoration ingredients.
When you decorate cake with strawberries, you are working with a material that has an inherently high visual contrast ratio against white, cream, or chocolate frosting — a property that professional food photographers deliberately exploit. A 2022 analysis of top-performing food posts on Instagram found that red fruit, particularly strawberries, appeared in the top-engaging dessert posts at a rate three times higher than any other single ingredient.
Seasonality matters to quality. Peak US strawberry season runs April through June in most regions, with California’s central coast producing the highest-volume commercial crop. During peak season, a pint of strawberries at a farmers market costs $3–$5 and delivers berries with a brix sugar content of 9–12° — genuinely sweet, firm-fleshed, and photogenic. Off-season berries from long-haul supply chains typically measure 5–7° brix, producing paler, softer fruit that does not decorate cake with strawberries at the same visual standard.
Essential Preparation Before You Decorate Cake with Strawberries:
Skipping preparation is where most decoration attempts fail before they start. Strawberries placed directly from the refrigerator onto a freshly frosted cake create three immediate problems: surface condensation that destabilizes the frosting, flavor dilution from cold fruit meeting warm tongue, and reduced adhesion on smooth buttercream surfaces.
- Rinse berries cold, dry them completely — wash strawberries under cold water, then spread them on paper towels for a minimum of thirty minutes; surface moisture left on the berry is the leading cause of frosting slide.
- Bring berries to room temperature before placement — cold strawberries dropped onto buttercream create small depression rings and localized frosting softening; room temperature berries sit cleanly.
- Select and sort by size before starting — group berries by visual size and shape before you decorate cake with strawberries; consistent sizing within each arrangement zone reads as intentional and designed.
- Hull cleanly, not excessively — remove only the calyx and the immediate white flesh beneath it; over-hulling exposes a large pale cavity that photographs poorly and destabilizes sliced fan arrangements.
- Pat each berry dry immediately before placement — even after thirty minutes of air drying, handling introduces finger moisture; a final pat with a dry kitchen towel is the last step before placing each berry.
Classic Arrangements to Decorate Cake with Strawberries on Top:
The top surface of a round cake is the primary photography plane — it is the angle every guest photographs first and the angle that appears in every food media composition. When you decorate cake with strawberries on the top tier, that arrangement needs to hold visual logic from directly above as well as from a 45-degree angle.
Classic arrangements have endured for decades because they solve the visual logic problem efficiently. Understanding why each arrangement works prevents the ad-hoc scattering approach that produces top surfaces that look accidental rather than designed.
1: The Concentric Circle Arrangement
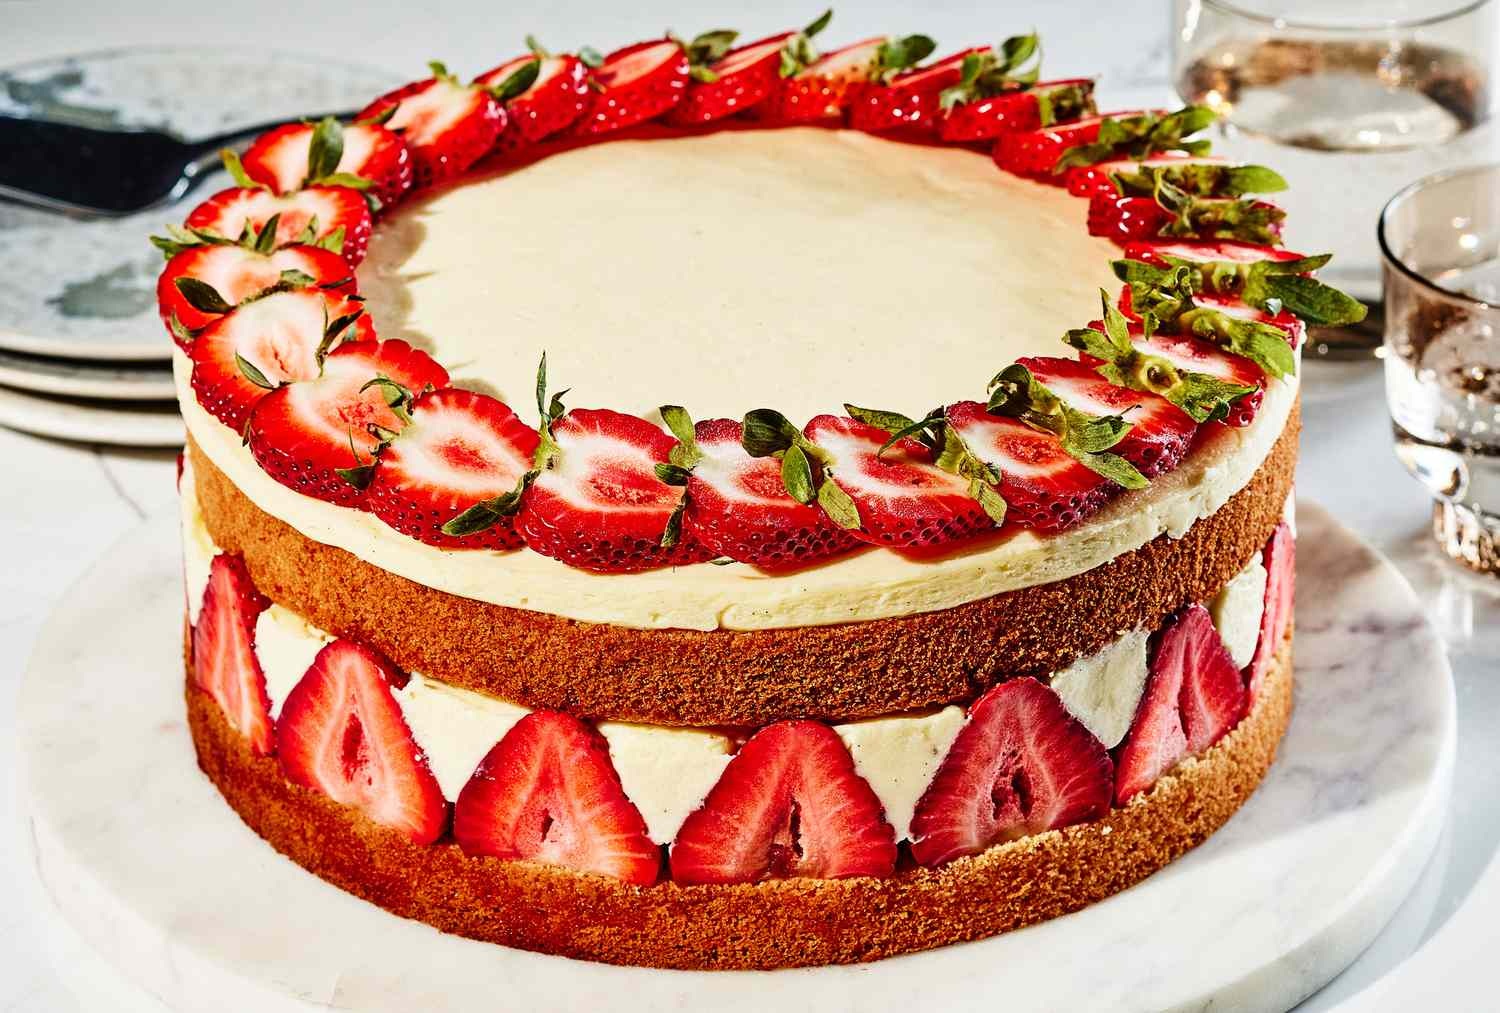
Start from the outside edge of the cake top and work inward in concentric rings. Place whole strawberries, hull-end down, touching the outer edge first — caps facing outward, points facing center. Fill the inner rings with progressively smaller berries, adjusting the direction to maintain an even visual rhythm. This is the most-used method professionals choose to decorate cake with strawberries for formal occasions because it looks equally intentional from any angle. The key mechanical detail: every berry in a ring should touch the berries on either side of it; gaps read as unfinished.
2: The Clustered Cascade Arrangement
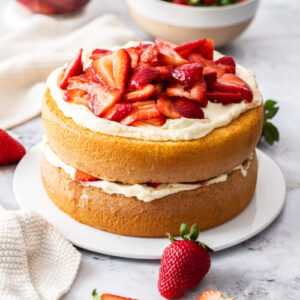
Rather than even distribution, a clustered cascade piles berries in one quadrant of the cake top, allowing the arrangement to appear to spill over the edge. This is a dramatically high-impact way to decorate cake with strawberries on single-tier cakes and works especially well on naked cakes where the visible sponge layers complement the organic berry aesthetic. Cluster the largest, most visually perfect berries at the center of the arrangement, tapering to smaller berries and any accompanying greenery or flowers at the edges.
3: The Halved-Berry Flat Arrangement
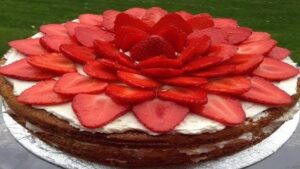
Slice strawberries cleanly in half from tip to hull using a sharp knife — not a serrated blade, which tears rather than cuts and produces ragged edges. Lay the halves flat, cut-side down, in overlapping rows across the entire top surface. The resulting arrangement looks like a pattern of red teardrops tiling the surface. This method is one of the most space-efficient ways to decorate cake with strawberries because half-berries cover more surface area per unit of fruit than whole berries and stay completely stable on flat frosted surfaces.
How to Decorate Cake with Strawberries on the Sides:
Side decoration is where most home bakers stop experimenting, and it is exactly where a little additional technique produces the most dramatic photographic upgrade. A cake decorated on its sides as well as its top photographs with three-dimensional visual interest from every angle — not just from directly above.
- Pressed halved berries into soft buttercream — immediately after applying and smoothing the side coat, press halved strawberries cut-side-in against the frosting before it sets; they embed cleanly and do not require adhesive.
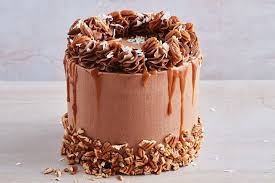
- Strawberry border at the base — whole berries placed hull-down around the bottom edge of the cake create a natural wreath border that lifts the cake visually and grounds the overall composition.
- Alternating berry and cream rosette pattern — pipe a rosette, place a halved strawberry against it, pipe the next rosette; the alternating pattern creates a scalloped border effect that runs cleanly around any tier circumference.
- Drip-and-berry combination — a chocolate or strawberry jam drip applied to the sides creates natural resting ledges for berry halves; the drips anchor the fruit and prevent downward sliding on vertical surfaces.
- Chocolate-dipped strawberry anchors at corners — on square or rectangular cakes, place a single chocolate-dipped strawberry at each corner of the top edge as an anchor decoration; it frames the cake from any frontal angle.
Using Chocolate-Dipped Strawberries to Decorate Cake:
Chocolate-dipped strawberries are among the most visually elevated ways to decorate cake with strawberries, and the technique is simpler than most home bakers believe. The single skill that determines the outcome is chocolate tempering — everything else is placement.
The critical preparation step most tutorials skip: the strawberries must be completely dry before dipping. Any surface moisture causes the chocolate coating to seize, produce a streaky finish, or slip off the berry surface entirely. If you are going to decorate cake with strawberries in dipped form, allow your prepared berries to air-dry for a minimum of one hour before dipping — longer in humid environments.
1: Basic Dark Chocolate Dipping Method
Melt 200g of dark chocolate (60–70% cocoa solids) using the seeding tempering method: bring 150g to 122°F, remove from heat, add the remaining 50g of finely chopped solid chocolate, and stir until the temperature drops to 88–90°F. Hold each prepared strawberry by the green hull, dip to approximately 80% coverage, allow excess to drip for three seconds, then place on a parchment-lined tray. Set at room temperature for 15–20 minutes — do not refrigerate, as refrigerator humidity causes bloom. To decorate cake with strawberries in dipped form, place the set berries onto the cake within two hours of dipping.
2: White Chocolate and Colored Drizzle Variations
After the dark chocolate base coat sets, melt white chocolate separately and load it into a small piping bag. Drizzle thin lines across the dipped berries in parallel stripes or a zig-zag pattern. Add food-safe colored candy melts for school colors, party themes, or seasonal palettes. These embellished dipped berries are the most photographically compelling way to decorate cake with strawberries for formal occasions, generating the kind of social media engagement that plain fruit arrangements do not.
Strawberry Fan Cuts and Decorative Slicing Techniques:
Slicing strawberries into specific geometric forms before placement transforms a simple fruit into a sculptural decoration element. When you decorate cake with strawberries using cut techniques rather than whole-berry placement, the resulting textures and forms carry a professional patisserie quality that reads as skilled even when the technique is genuinely beginner-accessible.
- Fan cut — slice the berry from tip to hull in four to six parallel cuts without cutting all the way through; press gently to spread the cuts into a fan shape; stand upright on the cake surface with the hull end as the base.
- Rose form — make concentric spiral cuts from the tip inward, each layer slightly offset from the one below, creating a loosely spiraling rose-shaped cross-section when the berry is set at a slight angle.
- Half-moon slice — cut the berry horizontally in thin, even rings; lay rings flat in overlapping rows for a scale or petal effect across flat frosted surfaces.
- Pointed crown cut — hull the berry, then make V-shaped alternating cuts around the equator of the berry to split it into two star-shaped halves; ideal for single-serving garnishes or cupcake toppers.
- Lengthwise thin strips — slice the berry in 2mm lengthwise sections; layer the strips overlapping slightly in a chevron or feather pattern when you decorate cake with strawberries using this method on rectangular cakes.
| Technique | Skill Level | Tools Required | Prep Time | Visual Impact | Best Frosting Surface |
| Whole berry concentric rings | Beginner | None | 10 min | High | Any frosting |
| Clustered cascade | Beginner | None | 8 min | Very High | Naked/buttercream |
| Fan cut arrangement | Beginner–Intermediate | Paring knife | 20 min | Very High | Smooth fondant/ganache |
| Halved berry tile | Beginner | Sharp chef’s knife | 12 min | High | Buttercream/ganache |
| Chocolate-dipped whole | Intermediate | Double boiler, thermometer | 45–60 min | Very High | Any frosting |
| Rose form single berry | Intermediate | Paring knife | 3 min per berry | Exceptional | Smooth fondant |
| Drip-and-berry side | Intermediate | Squeeze bottle/spoon | 30 min | Very High | Chilled buttercream |
| White chocolate drizzle | Intermediate | Piping bag | 20 min | Very High | Any frosting |
| Half-moon scale pattern | Intermediate | Sharp slicer | 25 min | High | Flat fondant surface |
| Pointed crown halves | Intermediate | Paring knife | 2 min per berry | High | Cupcake/single tier |
Timing: When to Decorate Cake with Strawberries for Maximum Visual Quality:
Fresh strawberries degrade over time on a frosted cake surface. Knowing the precise timing window for each technique prevents the most common visual failure: wilted, weeping berries on a photographed celebration cake.
Whole uncut strawberries placed on a well-chilled cake hold their visual quality for three to four hours at room temperature before surface moisture becomes visible. Sliced or cut berries expose more surface area and begin weeping in as little as 90 minutes at room temperature. This timing reality dictates a clear rule: decorate cake with strawberries as close to service time as possible, and never more than two hours before guests arrive for events with more than a 45-minute eating window.
1: Planning the Decoration Timeline
For a 6:00 PM party, here is the professional preparation sequence: bake and cool the cake the night before; frost, crumb-coat, and final-coat by 10:00 AM the morning of the event; refrigerate the frosted cake until 3:00 PM; remove and allow to come to room temperature until 4:00 PM; prepare strawberries at 3:30 PM while the cake warms; decorate cake with strawberries between 4:00 and 4:30 PM; display at room temperature from 4:30 PM to service. This timeline gives the decoration a 90-minute to two-hour display window — long enough to photograph and admire, short enough that quality holds.
2: Glazing to Extend Freshness
A thin application of neutral mirror glaze or apricot jam (warmed and strained) brushed over the placed strawberries extends visual freshness by sealing the cut surfaces against air oxidation. This is standard patisserie practice. Brush the glaze gently with a soft pastry brush immediately after placement. The glaze adds a professional shine to the fruit surface and noticeably extends the quality window by 30 to 60 additional minutes — a meaningful buffer when you need to decorate cake with strawberries for events where cutting is delayed.
Decorate Cake with Strawberries for Specific Occasions:
Different occasions call for different strawberry decoration approaches. The techniques that suit a casual birthday cake are not the same ones that suit a wedding anniversary dessert or a baby shower centerpiece.
- Birthday cakes — tall, abundant, piled arrangements of mixed whole and fan-cut strawberries with green hull-caps showing create festive energy and photograph well with candles; don’t over-engineer the arrangement.
- Wedding anniversary cakes — chocolate-dipped strawberries with white drizzle in a precise, symmetrical arrangement signal the occasion’s formality; pair with cream-colored frosting for an elegant palette.
- Baby shower cakes — strawberry roses placed symmetrically on pastel-frosted tiers add softness without competing with the palette; cut the green hulls short or remove them entirely for a cleaner, more delicate look.
- Valentine’s Day cakes — half-cut strawberries placed cut-side up form natural heart shapes; a heart arrangement of halved berries tiled across the cake top is one of the most romantic ways to decorate cake with strawberries for this specific occasion.
- Christmas cakes — strawberries alternating with green mint leaves or rosemary sprigs around the top border create a natural holiday wreath; the red-and-green combination is visually immediate and requires zero specialist materials.
Combining Strawberries with Other Ingredients for Elevated Decoration:
Strawberries alone create strong results. Strawberries paired deliberately with one or two complementary ingredients create results that look professionally designed rather than simply fruit-topped. The pairing principle is straightforward: choose one ingredient that adds color contrast, one that adds textural contrast, and keep everything else minimal.
When you decorate cake with strawberries alongside additional elements, the strawberry remains the visual anchor. Every supporting ingredient serves the strawberry, not the other way around. White chocolate shards add cream-and-beige contrast. Fresh mint adds a green dimension the hulls cannot provide alone. Edible gold leaf on the chocolate-dipped tips adds a luxury finish without competing with the berry’s natural color.
1: Strawberries and Cream Pairings on Cake
Piped cream rosettes or Chantilly cream dollops placed between strawberry clusters are the most classical pairing in European patisserie. The visual rhythm alternating cream-white and berry-red across the top surface creates a scalloped, abundant appearance that photographs exceptionally well. Pipe the cream first, then decorate cake with strawberries by pressing each berry lightly into the cream mound beside it. The cream acts as a stabilizer as well as a decoration element.
2: Strawberries with Edible Flowers
Viola, pansy, and borage flowers in purple, yellow, and blue tones create color combinations against red strawberries that look genuinely sophisticated. The flower scale matters — petals smaller than the berry surface look like accents; petals larger than the berry compete for visual dominance. One edible flower per three to four berries is the working ratio when you decorate cake with strawberries and flowers together. Place flowers in the negative space between berry clusters, not directly on top of the fruit.
Mistakes That Ruin Decorate cake with strawberries :
Most strawberry decoration failures trace back to a small number of entirely preventable errors. Knowing them before starting eliminates the most frustrating outcomes. Placing wet berries on buttercream creates the most common failure mode: a ring of moisture-softened frosting around each berry that is visible within twenty minutes of placement. Dry your berries completely. No exceptions.
Refrigerating a decorated cake after placement is the second most common mistake. Cold temperatures cause condensation on the berry surface during removal — the transition from cold to room temperature air creates visible water droplets that ruin glazed and unglazed berries alike. Always decorate cake with strawberries after the final refrigeration period, not before.
Overcrowding the arrangement is aesthetic failure, not technical failure. More is not always more. A single beautiful fan-cut berry in the center of a minimally frosted cake creates more visual impact than a chaotic pile of mismatched berries covering every visible surface. Restraint is a design choice, not a shortage.
Decorate Cake with Strawberries for Different Frosting Types:
Frosting type directly affects which strawberry decoration techniques are viable, how long the decoration holds, and whether additional adhesive is needed to keep berries in place.
American buttercream — the most common home baking frosting — is soft enough at room temperature that whole berries pressed lightly into the surface embed without sliding. Smooth ganache surfaces are the most photogenic base for sliced arrangements because the dark or cream surface creates maximum color contrast with red fruit. Whipped cream is the most time-sensitive frosting to decorate cake with strawberries on — it destabilizes faster than any other base, making a 60-to-90-minute maximum display window essentially non-negotiable.
Swiss or Italian meringue buttercream provides the cleanest surface for cut berry arrangements and holds refrigerator-cold, meaning berries can be placed on a chilled meringue-buttercream surface approximately 10 minutes before service without the condensation risk that affects standard buttercream. This is the technique professional pastry chefs use to decorate cake with strawberries at high-volume catered events where cakes must be prepared further in advance than two hours.
The Complete Step-by-Step Workflow to Decorate Cake with Strawberries:
Consolidating every preparation, timing, and placement principle into a single workflow produces consistent results regardless of technique.
Start with a fully cooled, crumb-coated cake that has been refrigerated for a minimum of 30 minutes. Apply the final frosting coat and smooth it to the finish appropriate for your chosen decoration style. Return the frosted cake to the refrigerator for 20 minutes to firm the surface.
While the cake chills, wash, dry, sort, and cut your strawberries according to your chosen technique. Prepare any chocolate dip, glaze, or complementary ingredients during this window.
Remove the cake from the refrigerator and allow it to rest at room temperature for 15 minutes before decoration — enough time for the surface to lose refrigerator brittleness without becoming too soft to hold fruit cleanly. Begin placement from the outermost edge and work inward on top arrangements. For side placements, work from the base tier upward. Apply glaze immediately after placement if you are using it. Photograph the completed cake before moving it. Carry without tilting. Serve within two hours of placement and watch every guest photograph it before the first slice is cut.
Summary
The techniques to decorate cake with strawberries range from a ten-minute whole-berry concentric ring arrangement to a forty-five-minute chocolate-dipped showpiece — and every method here is genuinely achievable without professional training. Proper preparation, timing discipline, and a basic understanding of how different frosting surfaces interact with fresh fruit are all that separate a great strawberry-decorated cake from a disappointing one.
FAQs
Q1: How long before a party should I decorate cake with strawberries?
Place fresh strawberries no more than two hours before service to maintain visual quality and prevent weeping.
Q2: Do I need to glaze strawberries when decorating a cake?
Glazing extends freshness and adds shine, but it is optional for events with a short display window under 90 minutes.
Q3: Can I decorate cake with strawberries if the frosting is whipped cream?
Yes — but limit the display window to 60 minutes maximum, as whipped cream destabilizes faster than buttercream under berry weight.
Q4: How do I stop strawberries from sliding off the sides of a cake?
Embed berries into soft buttercream before it sets, or use a chocolate drip on the sides to create natural ledges for fruit placement.
Q5: What is the best way to cut strawberries for a fan decoration on a cake?
Make four to six parallel cuts from tip to hull without cutting fully through, then press gently to spread into a fan shape.
Conclusion
To decorate cake with strawberries successfully, prepare your fruit completely dry, place it within two hours of service, match the arrangement scale to the tier size, and use glaze to extend visual freshness. One well-executed technique beats five rushed ones. Commit to the timing, pick the right arrangement for the occasion, and the results speak completely for themselves.