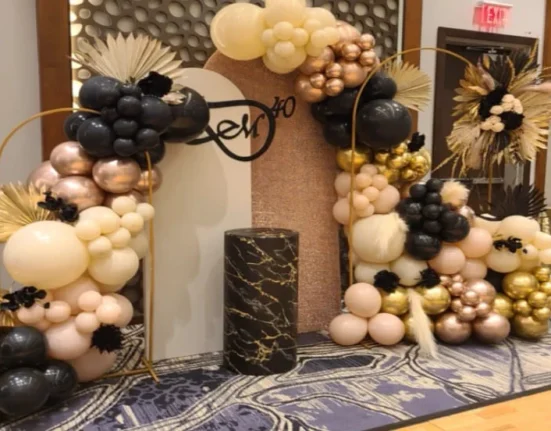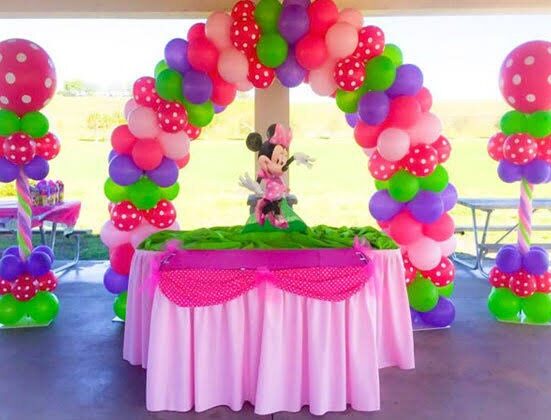
Learning how to decorate a balloon is one of the easiest, most affordable, and most satisfying DIY skills you can learn for parties and special events.
This guide shows you ten different ways to decorate a balloon — from simple drawings you can do with a marker in just a few minutes, to painted designs, glitter dips, calligraphy, ribbon styles, and more.
You’ll also find a full comparison chart, five helpful questions and answers, and an encouraging conclusion to help you start decorating balloons with confidence right away.
Why Knowing How to Decorate a Balloon Makes Every Party Better:

When people think of party decorations, balloons are usually the first thing that comes to mind. Balloons are fun — they bring color, lightness, and a happy feeling to any space really fast. But there’s a big difference between a few plain balloons tied to a chair and one that’s been thoughtfully and creatively decorated. A decorated balloon has personality. It shares a story. It makes someone feel seen and special in a way that a regular balloon from the store just can’t.
We’ll walk you through ten different techniques for decorating a balloon, from the easiest methods for beginners to more advanced styles that create amazing results .Every method includes clear instructions, a list of all the materials you need, and practical tips to help you achieve the best outcome. By the time you finish, you’ll have a complete set of balloon decoration ideas ready to use for your next celebration.
Before You Start: how to decorate a balloon About Decorating Balloons:

Knowing how to decorate a balloon is a genuinely useful skill — and the good news is that it does not require artistic talent, expensive equipment, or hours of time. The most impactful balloon decorations are often the simplest ones, executed with a little care and intentionality. Whether you want to write a heartfelt message on a balloon for someone’s birthday, create a confetti-filled clear balloon that looks like something from a professional event, add hand-painted designs to a set of balloons for a themed party, or dip a balloon in glitter for a glamorous New Year’s display, this guide has you covered.
Not all balloons are the same, and the technique you choose for how to decorate a balloon should influence the type of balloon you start with. Standard round latex balloons are the most versatile for decoration — they accept markers, paint, stickers, and glitter well, they are affordable, and they come in a huge range of sizes and colors. For confetti-fill techniques, clear or transparent latex balloons are essential because the whole visual effect depends on seeing the confetti through the balloon wall. For calligraphy, hand-lettering, and sticker decoration, larger 11-inch or 16-inch balloons give you more surface area to work with and make the decoration easier to see from a distance.
1:Choosing the Right Balloon for Decorating
Foil or Mylar balloons — the shiny metallic type — are less suitable for most direct-decoration techniques because their surface does not accept most markers and paints well. However, they are excellent bases for ribbon styling and as accent pieces within larger decorated displays. When learning how to decorate a balloon from scratch for the first time, start with standard latex balloons in white or a light neutral color, as these give you the clearest canvas for decoration work.
2:Inflate Before or After Decorating?
One of the most common questions people have when learning how to decorate a balloon is whether to decorate it before or after inflating. The answer depends on the technique. For drawing, painting, and most surface decoration, inflate the balloon first — the taut, firm surface of an inflated balloon is far easier to work on than the wrinkled, floppy surface of an uninflated one. For confetti-fill and internal decoration techniques, the confetti goes in before inflation. For ribbon and floral attachment, you inflate first and then add the attachment elements after. When in doubt: inflate first, then decorate.
10 Techniques for How to Decorate a Balloon:
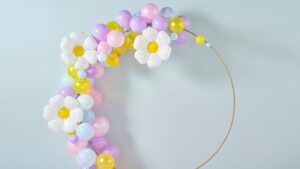
How to do it: Inflate the balloon to your desired size and tie it off. Hold the balloon steady — resting it on a table or in a bowl helps prevent it rolling how to decorate a balloon you draw. Use confident, deliberate strokes rather than hesitant scratching motions, which look shakier in the finished result. Write names, birthday messages, draw smiley faces, stars, hearts, simple florals, or any other imagery that suits the occasion. Allow each color to dry for thirty seconds before adding an adjacent color to avoid smearing.
How to do it: Mix a small amount of fabric medium into each acrylic color before applying — this makes the dried paint flexible rather than brittle, which prevents cracking as the balloon moves. Work in thin layers, allowing each layer to dry completely before adding the next. Start with background shapes and larger areas, then add detail work over the top once the base is dry. how to decorate a balloon applying very thick paint — it will crack and peel regardless of how much fabric medium you use.
Technique 1: Drawing and Writing with Permanent Markers
This is the fastest, easiest, and most accessible way to decorate a balloon, and the results — particularly for personal messages and simple designs — can be genuinely charming. It is the perfect starting point for anyone learning how to decorate a balloon for the first time .What you need: Inflated latex balloon, permanent oil-based markers in your chosen colors (Sharpie brand works excellently), a stable surface to rest the balloon on while you work.
Technique 2: Painting a Balloon with Acrylic Paint
Painting gives you the greatest creative freedom of any balloon decoration method — you can create realistic illustrations, abstract patterns, portraits, characters, or detailed artistic designs that go far beyond what a marker can achieve. This is the technique for how to decorate a balloon that produces the most visually impressive results when the skill is there. What you need: Inflated latex balloon, acrylic paint in your chosen colors, soft-bristled brushes in a range of sizes, palette for mixing, and a drying stand or holder to keep the balloon stable while you work.
Technique 3: Creating a Confetti-Filled Balloon
Confetti-filled clear balloons are among the most beautiful single balloon decoration ideas available, and they look far more expensive and professional than they actually are. Learning how to decorate a balloon this way costs virtually nothing and creates something genuinely stunning. What you need: Clear latex balloon, metallic or tissue confetti in your how to decorate a balloon colors, a small funnel.
How to do it: Before inflating, use a small funnel to pour two to three tablespoons of confetti into the uninflated balloon. Inflate the balloon with air (not helium, which dissipates too quickly) using a pump, tie it off, then rub the outside of the balloon vigorously against a wool jumper or nylon fabric to generate static electricity. The static draws the confetti how to decorate a balloon to cling to the inner walls of the balloon rather than sitting in a pile at the bottom.
Technique 4: Ribbon and Tassel Styling
Ribbon and tassel decoration transforms a plain balloon into a beautiful, festive object through the simple addition of carefully chosen flowing embellishments. This technique for how to decorate a balloon requires no artistic skill and takes only minutes but creates a significant visual impact .What you need: Inflated balloon, ribbon in multiple colors or textures, curling tool or scissors, optional tissue paper tassels.
Technique 5: Applying Stickers and Vinyl Decals
Sticker decoration is one of the most efficient methods for how to decorate a balloon when you need to decorate multiple balloons quickly or want a consistent, themed look across a large number of balloons without requiring individual artistic effort for each one .What you need: Inflated balloon, adhesive stickers, vinyl decals, or custom-printed labels in your theme.
How to do it: Inflate the balloon and allow the surface to stabilize for a minute or two before applying stickers — the balloon surface needs to be fully taut and room temperature for stickers to adhere properly. Apply stickers by peeling them carefully and pressing firmly from the center outward to eliminate air bubbles. Vinyl decals cut with a Circuit or Silhouette machine give you the ability to create custom text, logos, and shapes in any color — excellent for birthdays, corporate events, and themed how to decorate a balloon where personalization is important.
Technique 6: Glitter Dipping
A glitter-dipped balloon is one of those decoration techniques where the result looks dramatically more impressive than the effort involved. It is the technique for how to decorate a balloon that consistently gets the most compliments at glamorous events, New Year’s parties, and prom nights. What you need: Inflated balloon, PVA glue or spray adhesive, fine metallic glitter in your chosen color, newspaper or parchment paper to catch excess.
How to do it: Lay newspaper beneath your workspace to catch falling glitter. Apply a thin, even coat of PVA glue or spray adhesive to the lower half (or the full surface, if you prefer full coverage) of the inflated balloon. Immediately sprinkle fine metallic glitter generously over the glued surface, rotating the balloon to ensure even coverage. Shake off excess glitter over the newspaper and allow to dry completely — at least two hours — before handling. Gold, silver, and rose gold glitters produce the most sophisticated results.
Technique 7: Spray Paint Ombre and Color-Block Effects
Spray painting allows you to create smooth, graduated Ombre effects and bold color-block designs on balloons that are impossible to achieve with brush painting. This method for how to decorate a balloon requires working outdoors or in a very well-ventilated space and using spray paint specifically formulated for rubber surfaces.
What you need: Inflated latex balloon, rubber-safe or multi-surface spray paint, masking tape (for color-block), protective newspaper.
How to do it: For an Ombre effect, hold a single color of spray paint approximately thirty centimeters from the balloon surface and apply in a single smooth pass across the lower portion only, gradually fading toward the center. For a color-block effect, apply masking tape in a straight line around the balloon’s equator, spray one color on the lower half, allow to dry completely, remove the tape, then spray a contrasting color above the line. Always use thin, light coats and keep the can moving to avoid blotching.
Technique 8: Washi Tape Patterns
Washi tape — the decorative Japanese masking tape available in hundreds of colors, patterns, and widths — is one of the most cheerful and accessible tools for decorating a balloon. It sticks to latex balloon surfaces well enough to last for the duration of most events, adds vivid color and pattern instantly, and requires absolutely no artistic skill.
What you need: Inflated balloon, washi tape in multiple patterns and colors, scissors. How to do it: Cut strips of washi tape in varying lengths and apply them directly to the inflated balloon surface in horizontal stripes, diagonal patterns, chevron arrangements, or random patchwork designs. Mixing several coordinating washi tape patterns — polka dots, stripes, florals — in a consistent color palette creates a playful, cohesive result. This technique for how to decorate a balloon is particularly popular for children’s parties and colorful casual celebrations.
Technique 9: Hand-Lettered Calligraphy
How to do it: Practice your lettering on paper before committing to the balloon surface — chalk markers and paint pens are harder to how to decorate a balloon than pencil. If you are new to hand-lettering, keep the design simple — a single name, date, or short phrase in your best handwriting will look more elegant than an overcrowded design. Use a chalk marker (which can be wiped away with a damp cloth if you make an error) rather than a permanent marker while you are still developing confidence. Apply the lettering in smooth, decisive strokes and allow to dry fully before touching.
Technique Attaching Dried Flowers and Greenery:
A balloon decorated with small dried flowers, eucalyptus leaves, or faux botanical elements has a romantic, artisanal quality that makes it feel genuinely sophisticated. This approach to how to decorate a balloon is particularly how to decorate a balloon for bohemian weddings, rustic garden parties, and any celebration with a natural, organic aesthetic.
What you need: Inflated balloon, small dried flowers or preserved eucalyptus, low-temperature hot glue gun (or waterproof floral adhesive tape), ribbon for the neck.
How to do it: Arrange your dried botanical elements loosely on the surface of the inflated balloon to plan your design before gluing. Use a low-temperature hot glue gun — never high temperature, which will pop the balloon — to apply a tiny amount of glue to each stem or botanical element before pressing it gently onto the balloon surface. Build up the design by adding elements in clusters at the balloon’s base or neck area, wrapping ribbon around the knotted neck to conceal the attachment points.
How to Decorate a Balloon: Quick-Reference Comparison Table:
Use this table to compare all ten decoration techniques side by side and find the right approach for your time, skill level, and occasion:
| Decoration Technique | Materials Required | Time Needed | Difficulty | Best For |
| Permanent Marker Drawing | Oil-based permanent how to decorate a balloon and an inflated balloon | 5–10 minutes | Beginner | Writing names, birthday messages, doodles, and simple designs |
| Acrylic Paint Design | Acrylic paint, fabric medium, and soft brushes | 20–45 minutes | Intermediate | Hand-painted artwork, cartoon characters, and custom decorations |
| Confetti Fill | Clear balloons, lightweight confetti, and a cloth to create static | 10–15 minutes | Beginner | Birthdays, weddings, baby showers, and New Year’s celebrations |
| Ribbon & Tassel Tie | Curling ribbon, tassels, scissors, and a ribbon curler | 5–10 minutes | Beginner | Balloon bouquets, party entrances, and table centerpieces |
| Sticker & Vinyl Decal | Stickers or adhesive vinyl with an optional cutting machine | 5–15 minutes | Beginner | Personalized balloons, themed parties, and business events |
| Glitter Dip | Craft glue (PVA), fine glitter, newspaper, and a foam brush | 15–30 minutes | Beginner | Glam parties, anniversaries, New Year’s Eve, and photo backdrops |
| Spray Paint Effect | Balloon-safe spray paint, masking tape, and protective covering | 20–40 minutes | Intermediate | Ombre, metallic finishes, and modern party décor |
| Washi Tape Patterns | Washi tape, scissors, and an inflated balloon | 10–20 minutes | Beginner | Children’s parties, colorful displays, and DIY crafts |
| Hand-Lettered Calligraphy | Paint pens or chalk markers | 10–30 minutes | Intermediate | Weddings, milestone birthdays, baby showers, and personalized gifts |
| Floral & Greenery Attachment | Faux or dried flowers, greenery, and a low-temperature glue gun | 15–25 minutes | Beginner–Intermediate | Rustic weddings, bridal showers, how to decorate a balloon themes, and elegant celebrations |
Common Mistakes to Avoid When Decorating a Balloon:
A balloon decorated with beautiful hand-lettered calligraphy has an elegance and intentionality that feels genuinely luxurious, and it transforms a simple balloon into a meaningful personal gift or statement decoration for weddings, milestone birthdays, and romantic celebrations. What you need: Inflated balloon (white, blush, or light-colored for best contrast), chalk marker or paint pen in white, gold, how to decorate a balloon , or black, optional pencil for light guidelines.
How to do it: Cut ribbon into lengths of thirty to sixty centimeters. Tie multiple ribbons to the knotted neck of the balloon — varying colors, textures, and widths creates the most visually interesting result. To curl ribbon, hold one end firmly and draw a scissors blade firmly along the ribbon’s length while keeping slight tension. For a more dramatic effect, make tissue paper tassels by folding a sheet of tissue paper accordion-style, pinching the middle, folding in half, and fanning out the edges. Tie the tassel bundle to the balloon neck alongside the ribbons.
1:Using the Wrong Type of Marker
One of the most frequent mistakes people make when learning how to decorate a balloon is reaching for whatever marker is closest — a washable school marker, a felt-tip pen, or a highlighter — and being disappointed when it smears, beads up on the surface, or wipes off at the first touch. Always use oil-based permanent markers or acrylic paint pens, which bond properly to latex. If you are working on dark-colored balloons, use opaque markers with a white or metallic base that will show up clearly against the background color.
2:Overinflating Before Decorating
Balloons that are inflated to their absolute maximum are much more likely to pop during decoration, especially when you are pressing markers, stamps, or stickers against the surface. When learning how to decorate a balloon, inflate to approximately eighty to ninety percent of maximum capacity. This leaves enough room for the surface to flex slightly under pressure during decoration without stressing the latex to its breaking point.
3:Applying Heat-Based Tools Directly to the Balloon
Hot glue guns, heat guns, hair dryers on high heat, and soldering irons will instantly pop a latex balloon. When using a hot glue gun for botanical attachment or any other technique, always use a low-temperature setting, apply the glue to the decorative element rather than directly to the balloon surface, and allow the glue to how to decorate a balloon for three to five seconds before pressing the element onto the balloon. Even brief direct contact between hot glue and latex can cause an immediate pop.
4:Decorating in Direct Sunlight
UV exposure degrades latex quickly and causes it to become brittle and opaque. Working outdoors in direct sunlight when learning how to decorate a balloon is not ideal — both because the heat can cause the balloon to expand beyond comfortable working size, and because UV degradation begins immediately on exposure. Work indoors or in shade, and store decorated balloons away from direct sunlight until they are needed.
How to Make Decorated Balloons Last Longer:
The effort you put into decorating a balloon deserves to last as long as possible. There are several practical steps that will significantly extend the life and appearance of any decorated balloon.
- Treat helium-filled latex balloons with Hi-Float before inflation — this sealant applied to the inside of the balloon extends float time from twelve to twenty-four hours to two to three days or more.
- Keep decorated balloons away from heat, direct sunlight, and air conditioning vents, all of which accelerate latex degradation.
- Avoid placing decorated balloons near sharp edges, rough surfaces, or Velcro — all of which will pop latex instantly.
- For air-filled decorated balloons displayed in indoor environments, expect them to remain in good condition for two to four days, sometimes longer in cool, stable conditions.
- Store decorated balloons in cool, dry conditions away from light if they need to be prepared in advance — a cool how to decorate a balloonroom is ideal.
- If a decorated balloon must be transported, use a large clear plastic bag as a loose protective cover that prevents contact with sharp or rough surfaces during the journey.
Summary
Learning how to decorate a balloon is a simple way to create eye-catching, personalized party decorations. From markers and paint to confetti, glitter, ribbons, and fresh florals, there are plenty of creative techniques for every skill level. Using the right materials and following a few practical tips will help you achieve professional-looking results. With a little creativity, you can transform ordinary balloons into beautiful decorations for birthdays, weddings, baby showers, and other special occasions.
FAQs
1.What is the best marker for decorating balloons?
Oil-based permanent markers work best because they dry fast, don’t smudge easily, and stick well to latex balloons. For dark balloons, you can use white or metallic paint pens to make your designs stand out clearly.
2.How do I keep confetti from settling at the bottom of a balloon?
After you inflate the balloon, rub it with wool, nylon, or even your hair to create some static electricity. This helps the light confetti stick to the inside of the balloon instead of falling to the bottom.
3.Can I decorate balloons a day before my event?
Yes, you can.Air-filled balloons can be decorated 1–2 days ahead and still look nice .Helium-filled balloons are better decorated on the day of the event unless you use a balloon sealant to help them last longer.
4.Can I use regular acrylic paint on balloons?
Yes, but you should mix it with a small amount of fabric medium to keep it flexible. Apply thin layers and let each one dry completely to avoid cracking or peeling.
5.What is the easiest way to decorate balloons for beginners?
Using permanent markers, ribbons, stickers, or confetti-filled clear balloons are simple options. These methods need only a few things, take little time, and make great decorations for any celebration.
Conclusion
Learning how to decorate a balloon is an easy way to make any celebration more personal and memorable. With simple techniques, the right materials, and a little creativity, you can create beautiful balloons for birthdays, weddings, baby showers, and other special occasions that leave a lasting impression.